You are on the documentation page for the ThePay 2.0 plugin, which integrates the ThePay 2.0 payment gateway into WooCommerce.
To implement the payment gateway, you need to have completed ThePay 2.0 registration.
You can purchase the ThePay 2.0 plugin here: Toret ThePay 2.0 for WooCommerce
Plugin Installation
Upon purchasing the plugin, you will receive a license key and a download link for the plugin zip file via email. You can find detailed instructions on how to install the plugin from your computer into WordPress here.
Plugin Activation
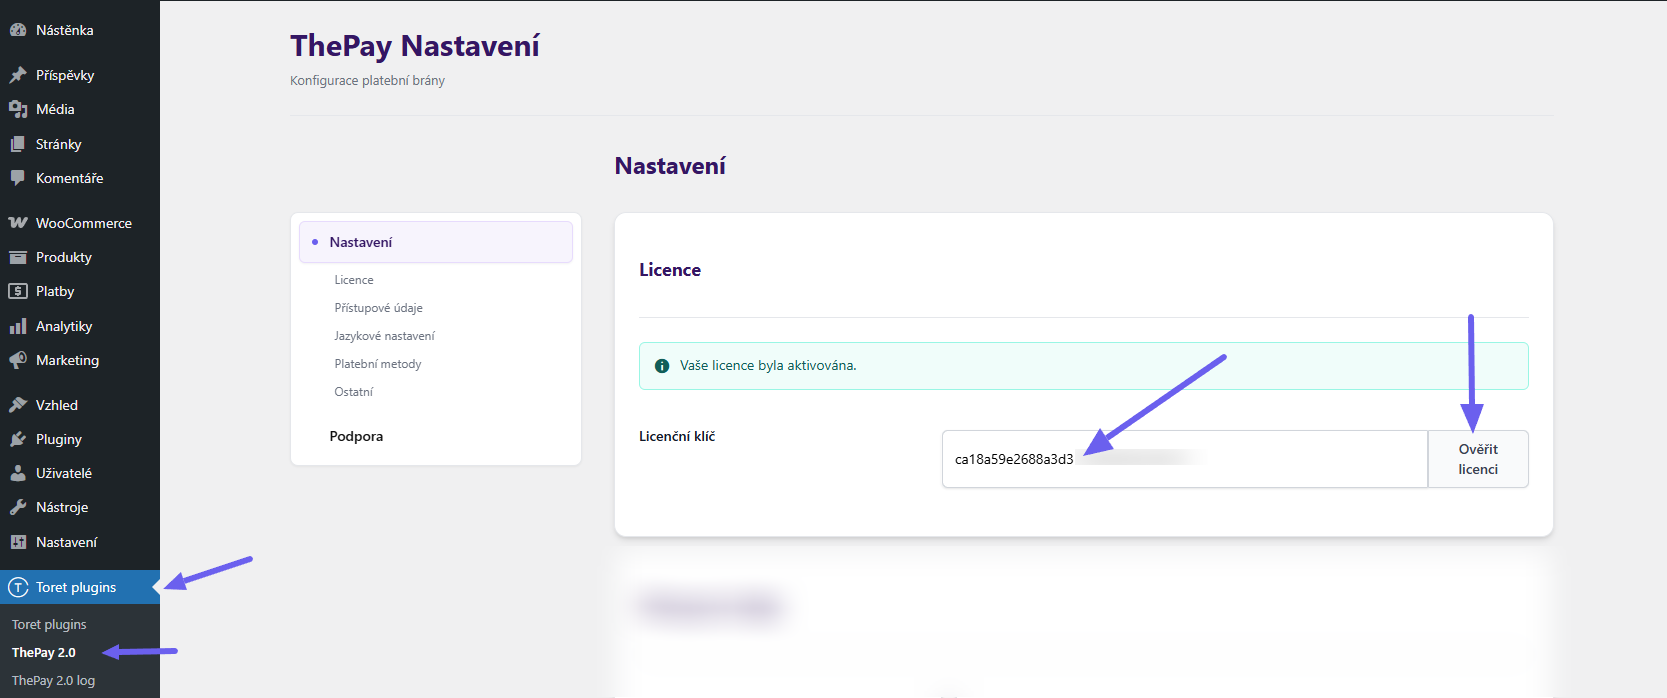
After installing the plugin, open the ThePay 2.0 plugin (Toret Plugins > ThePay 2.0), insert the license key into the appropriate field, and click the button to activate.
ThePay 2.0 Implementation Data
After concluding the contract with the ThePay payment gateway provider, you will find the implementation data in your ThePay account under the Implementace (Implementation) tab.
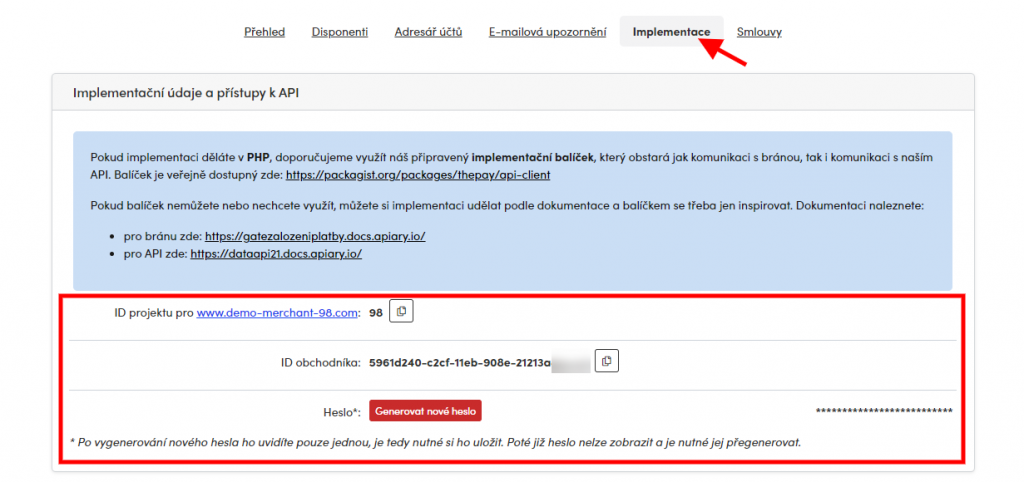
Copy these data and then paste them into the identically named fields in the plugin settings (see below).
Allowing IP Address for API Communication
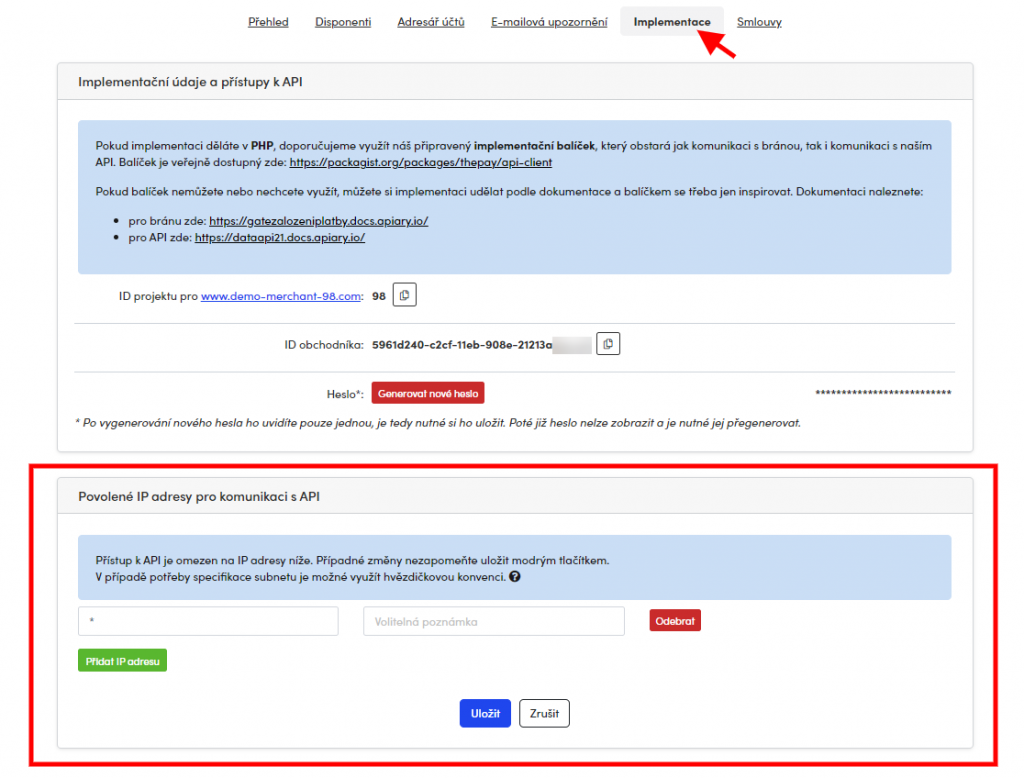
The next step is to allow IP addresses in the ThePay account administration. This setting can be found under the Implementace (Implementation) tab.
These are the IP addresses of the server where you host your website. Contact your hosting provider to obtain these IP addresses.
If you need to specify a subnet, you can use the asterisk convention.
For example, 19.2.168.* for subnet 192.168.00 -192.168.255.255
To allow all IP addresses, use a single *.
Setting Implementation Data in the Plugin
After installing and activating the plugin, you need to insert the implementation data from your ThePay account (see above) into the plugin. You can find the relevant fields in the section Toret plugins > ThePay 2.0.
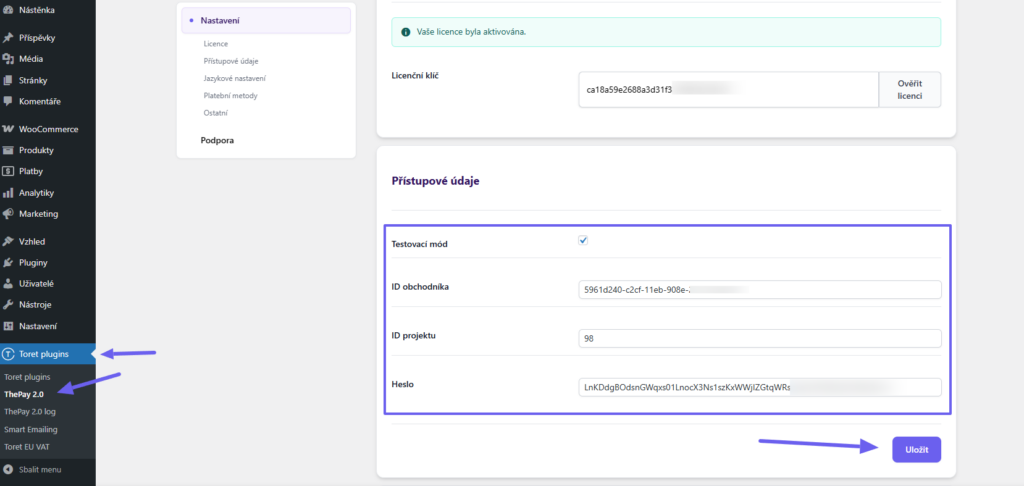
Testovací mód (Test mode) – activate/deactivate the test environment in this checkbox
ID obchodníka a ID projektu (Merchant ID and Project ID) – enter the IDs assigned to you here
Heslo (Password) – enter the password you generated in your account here
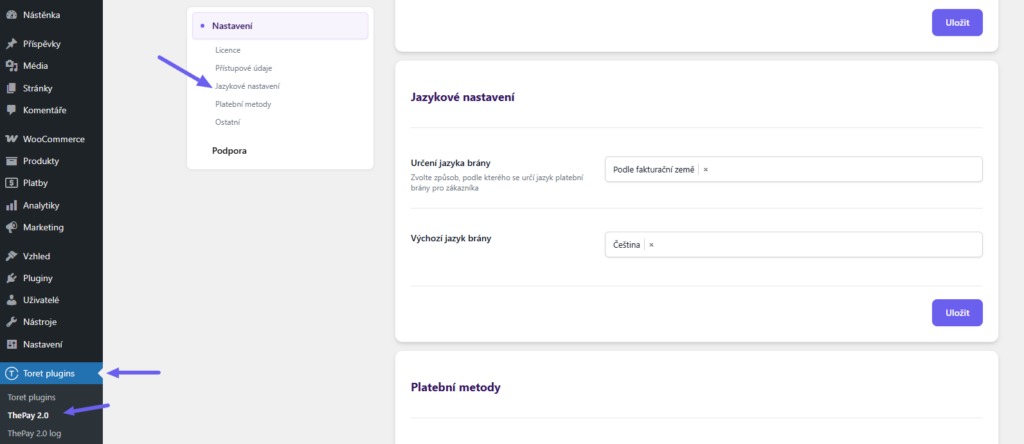
Payment Gateway Language Settings
In the plugin settings (Toret plugins > ThePay 2.0), you can also set the default language of the payment gateway and the method how the language is determined – by billing country or by WordPress language.
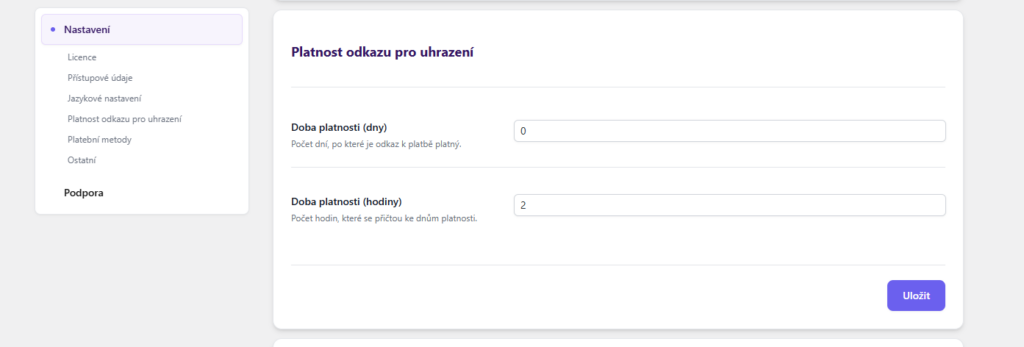
Payment Link Validity
Here you can set how long the payment link will remain valid. The validity can be specified in days and hours.
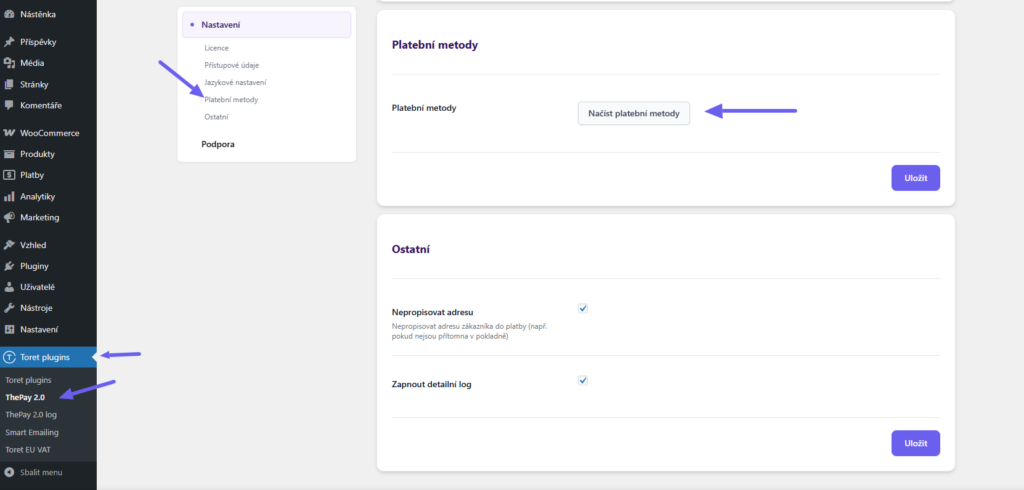
Loading Payment Methods
The plugin loads available payment methods directly from the ThePay system. Start loading by clicking the “Načíst platební metody” (Load payment methods) button in the plugin settings (Toret Plugins > ThePay 2.0 > Platební metody)
Payment Method Settings
Set the payment method in WooCommerce > Settings > Payments. The payment method ThePay is a grouped payment method through which you can set all payment methods available for your payment gateway. This method is compatible only with the default WooCommerce checkout.
If you use a checkout with blocks (Gutenberg checkout) in your e-shop, you need to set up separate payment methods (e.g., ThePay: Platební karta (Payment Card), ThePay: Moneta Bank, etc.)
Grouped Payment Method Settings
This is the payment method ThePay. This payment method is compatible only with the default WooCommerce checkout, and you can set all available payment methods for this payment gateway through it.
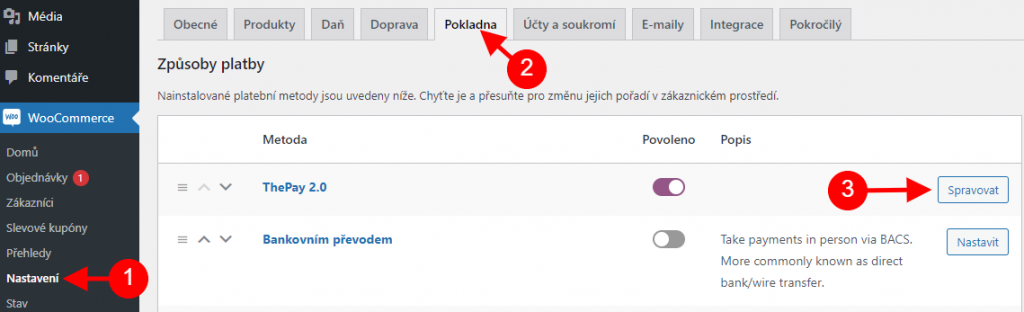
After clicking on the detail of the ThePay 2.0 payment method, you can start configuring.
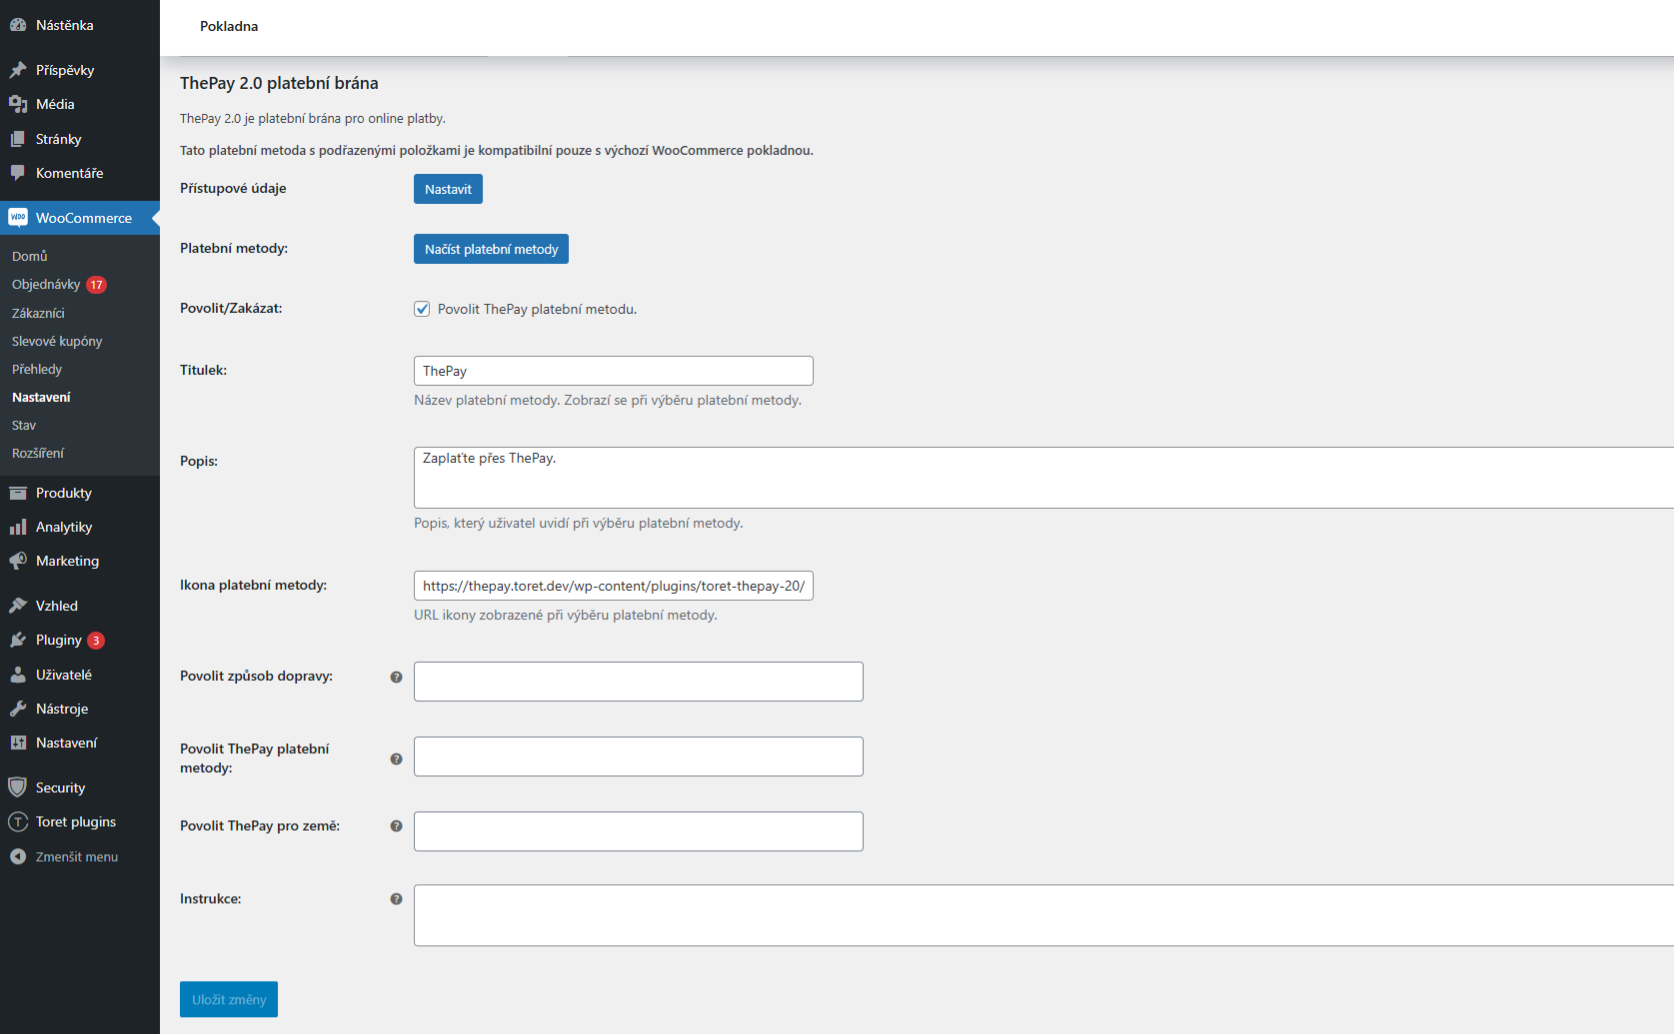
The plugin settings contain the following items:
- Povolit/Zakázat (Enable/Disable): Checking enables the payment method.
- Titulek (Title): Enter the name of the payment method that will be displayed in the checkout and cart.
- Popis (Description): Here you can add a note to the ThePay payment method, which will be displayed in the checkout.
- Ikona platební metody (Payment Method Icon): If you want to display a custom icon for the ThePay payment method on the checkout page, enter the full image URL here.
- Povolit způsob dopravy (Enable Shipping Method): Select for which shipping methods you want to have this payment gateway available. Leave the field empty to enable all shipping methods.
- Povolit ThePay platební metody (Enable ThePay Payment Methods): Select which ThePay payment methods you want to have available in the checkout.
- Povolit ThePay pro země (Enable ThePay for Countries): Select for which countries the payment gateway will be used.
- Instrukce (Instructions): Here you can write additional information about the payment method for the user. Displayed in the email to the customer.
After filling in the details, don’t forget to click the Uložit změny (Save Changes) button.
Separate Payment Methods Settings
Separate payment methods (e.g., ThePay: Payment Card, ThePay: Moneta, etc.) need to be set if you use a checkout with blocks (Gutenberg checkout). Perform the settings similarly for all methods you want to offer in the checkout.
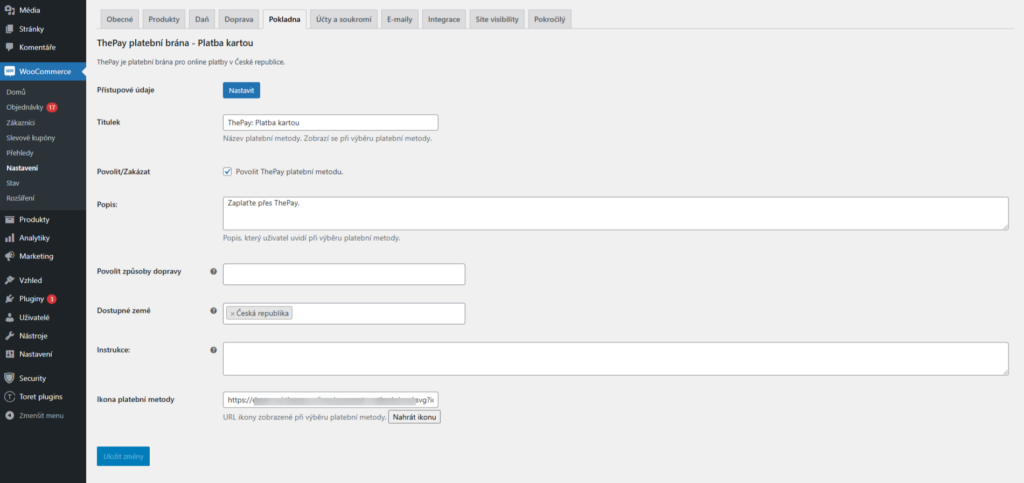
1. Titulek (Title) – here you can edit the payment method name as it will be displayed when selecting the payment method at checkout
2. Povolit/Zakázat (Enable/Disable) – by checking this box, you determine whether customers will have this payment method available on the Checkout page or not
3. Popis (Description) – in this field, you can describe the payment instructions for the customer
4. Povolit způsob dopravy (Enable Shipping Method) – if you want to enable all shipping methods, leave this field empty. Alternatively, you can define only certain shipping methods for the payment gateway.
5. Dostupné země (Available Countries) – specify for which countries the gateway will be available
6. Ikona platební metody (Payment Method Icon) – if you want a custom payment method icon, enter its URL here. Otherwise, the default icon from the plugin is set.
Do not forget to save the changes made. Perform this setting for all methods you want to offer in the checkout.
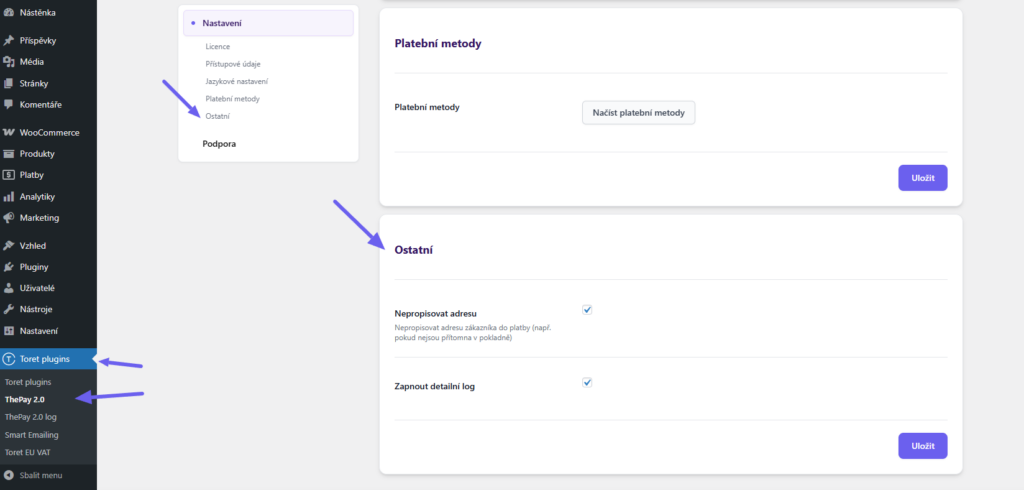
Other Settings
In the plugin settings (Toret Plugins > ThePay 2.0 > Ostatní (Other)) you can:
Enable the Nepropisovat adresu (Do not overwrite address) function: Use this function if you do not have the customer’s address available (e.g., if your checkout does not have these fields)
Zapnout detailní log (Enable detailed log): Use in case of functionality issues.
Plugin testing
For testing purposes, you can use:
- the subdomain “dev.domainlicense” (with the same license as for the production website)
- localhost (127.0.0.1)
Purchased plugins will also work in these locations, and you can test their implementation and compatibility here before deploying them to the website and during its use.
FAQ
Customer is not redirected to ThePay payment gateway after completing the order
If a customer selects the ThePay payment method, completes the order, the order is created in WooCommerce, but the customer is not redirected to the payment gateway, it may be due to the following issues:
- Incorrectly entered implementation data in the plugin from ThePay administration.
- Time desynchronization. Contact ThePay support and have the failed payment checked. Their support will confirm any time desynchronization with the server where you host the website. In this case, it will be necessary to synchronize the server time.
Adjusting Paid Order Status
After payment via the ThePay plugin, its status changes from “Pending payment” to “Processing” if the order contains physical products, or the plugin changes the order to “Completed” if it consists only of virtual products.
In case the order status after payment does not suit you, you can modify it using a filter.
Order of virtual products:
add_filter(‚toret_thepay20_virual_paied_product_status‘,’cutom_toret_thepay20_virual_paied_product_status‘,10,2);
function cutom_toret_thepay20_virual_paied_product_status($status,$order_id){
return ‚processing‘;
}
Order of physical products:
add_filter(‚toret_thepay20_paied_product_status‘,’custom_toret_thepay20_paied_product_status‘,10,2);
function custom_toret_thepay20_paied_product_status($status,$order_id){
return ‚processing‘;
}
Example is given for changing order status to “Processing”.
Insert the filter into the child theme’s functions.php or into an empty plugin e.g.: https://toret.cz/produkt/boilerplate/