You are on the documentation page for the GP webpay plugin, which integrates the GP webpay payment gateway into WooCommerce.
You can purchase the GP webpay plugin here: Toret GP webpay for WooCommerce
- Plugin Installation
- Plugin Activation
- Connecting to GP webpay
- Automatic Payment Status Loading
- Test Payment Card
- FAQ
- Plugin testing
Plugin Installation
Upon purchasing the plugin, you will receive a license key and a download link for the plugin zip file via email. You can find detailed instructions on how to install the plugin from your computer into WordPress here.
Plugin Activation
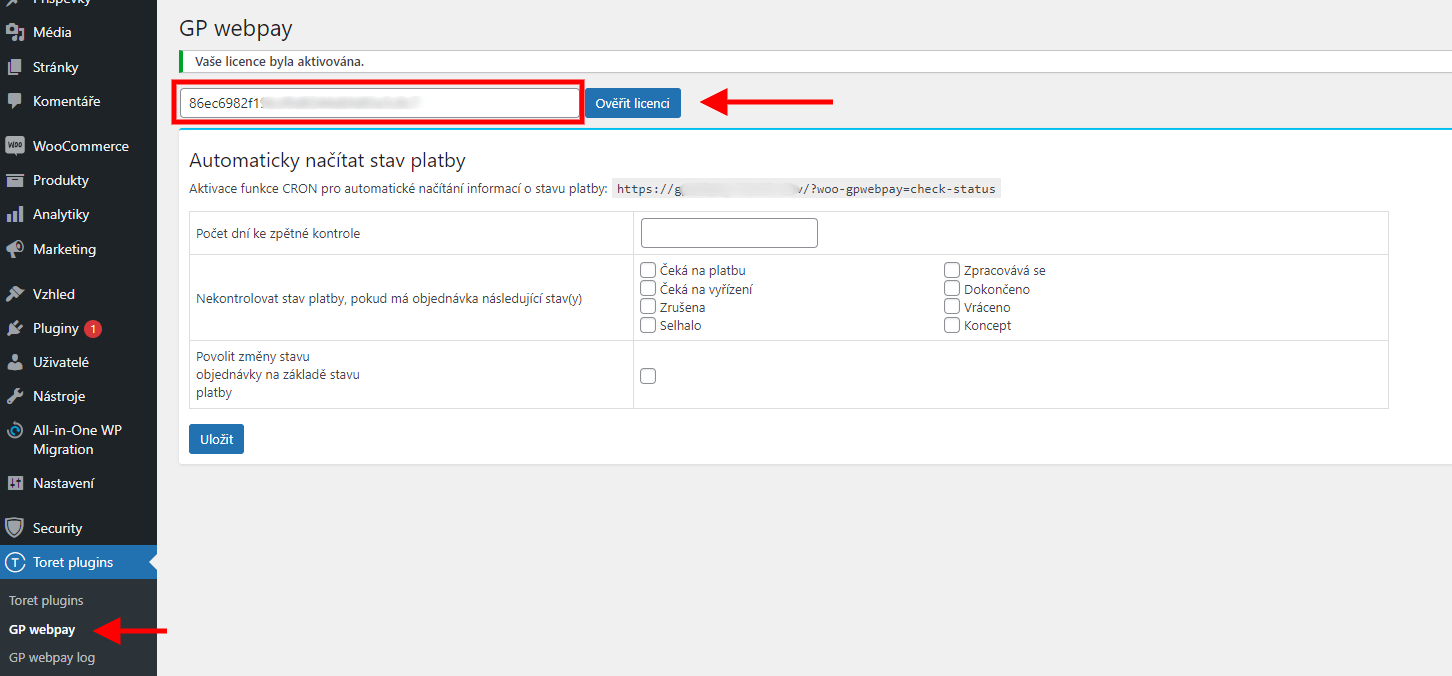
After installing the plugin, open the GP webpay plugin, insert the license key into the appropriate field, and verify the license.
Connecting to GP webpay
After installation and activation of the plugin, it is possible to proceed with connecting to GP webpay. For correct implementation of GP webpay on your e-shop, you will need a signed contract with the payment gateway provider. If you have everything sorted out, you will receive access to the test interface from the payment gateway provider.
You can find the payment gateway settings in WooCommerce → Settings (Nastavení) → Payments (Pokladna) → GP webpay.
Connecting the Plugin with the Payment Gateway
Below you will find the steps required to create, download, and upload keys to the GP webpay environment and WordPress.
First, it is necessary to launch the payment gateway in test mode and perform test payments. After performing test payments (you will have the test card number in the email or find it here) and successful verification by GP webpay, you will receive production access credentials. Only with them is it possible to start the live operation of the payment gateway.
Detailed instructions below ↓
1. Logging into the Test Environment.
You can find the login at https://test.portal.gpwebpay.com/. You will receive access credentials by email directly from GP webpay upon signing the contract.
After logging in, you will be prompted to confirm details and change the generated password. A code for confirming the change will be sent to your email.
2. Creating and Saving a Test Key
Log in again. Now it is necessary to generate a private key.
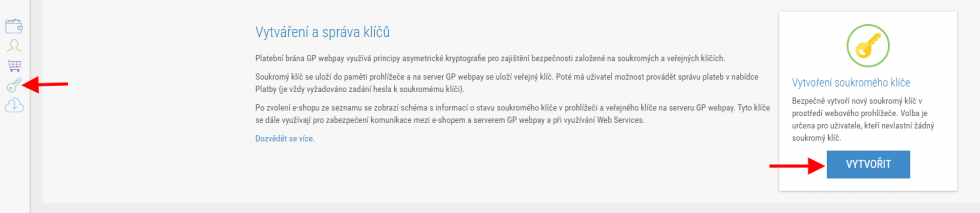
Private Key
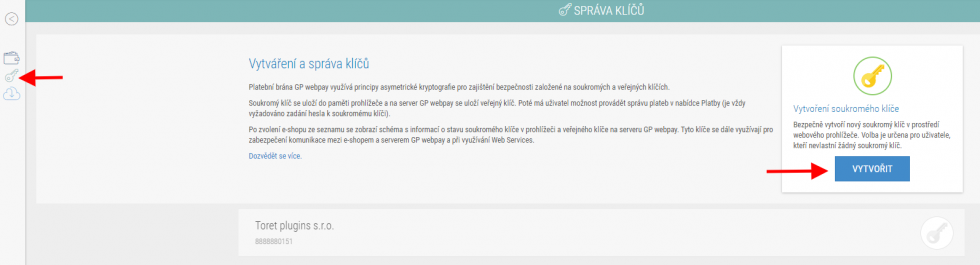
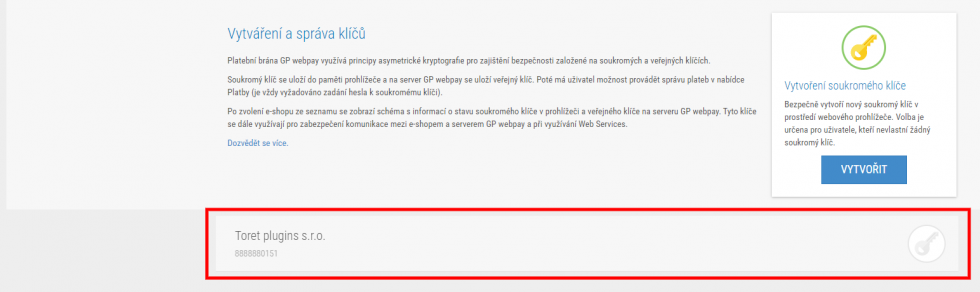
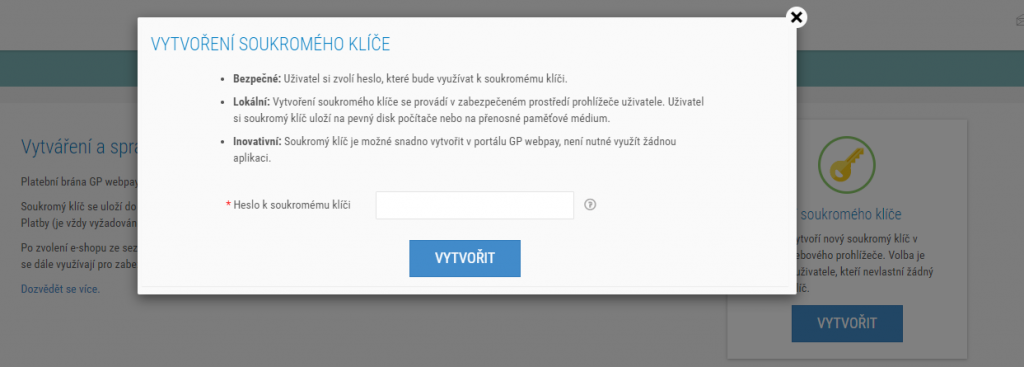
Creating and uploading a private key consists of several steps. First, go to the Správa klíčů (Key Management) section and click on Vytvořit (Create).
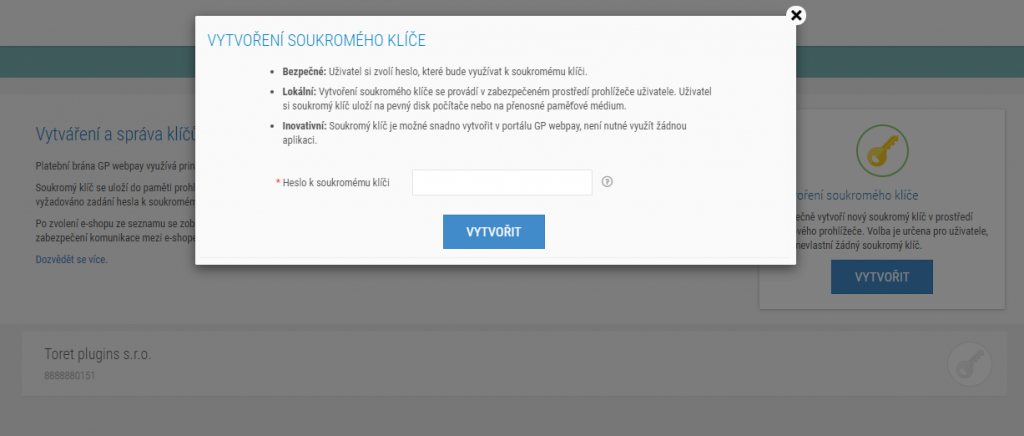
In the next step, create any password for the key, which you should note down. You will need it further in the GP webpay account and when configuring the plugin, see Plugin Settings.
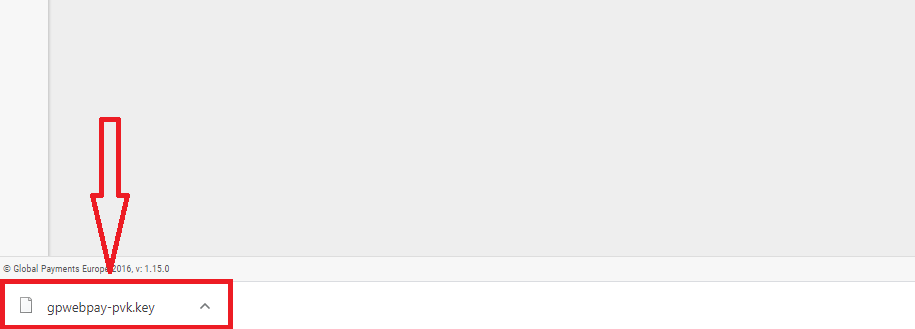
After creation, the key will be downloaded to your computer.
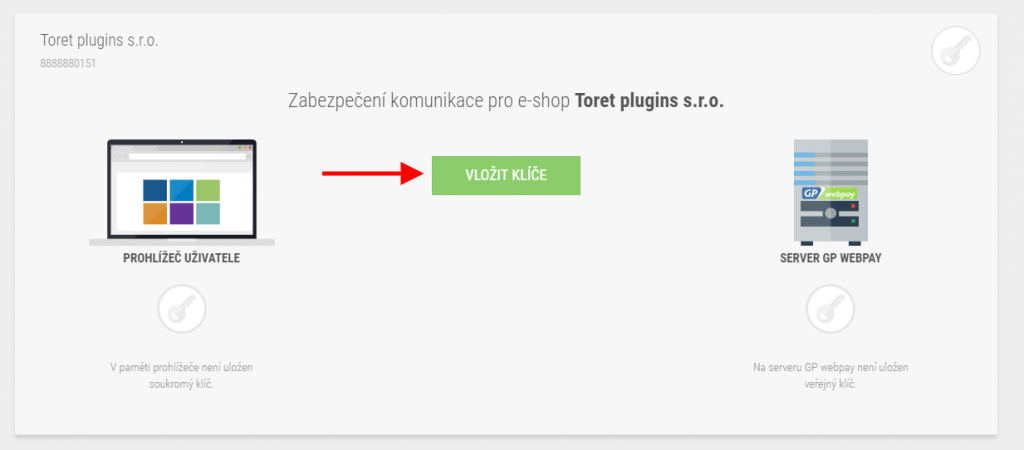
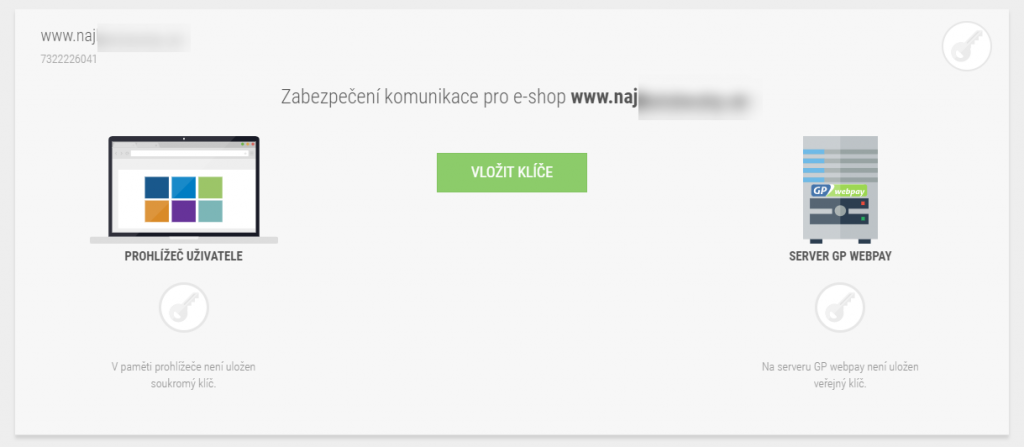
Now save the key to the browser memory: Return to the Správa klíčů (Key Management) section and click on the e-shop.
Then insert the key that was downloaded to your computer.
When inserting the private key into the browser memory, select the Trvale (Permanently) → option via the Vybrat soubor (Choose file) button insert the downloaded key → fill in the password you created in the previous step → insert the key with the button.
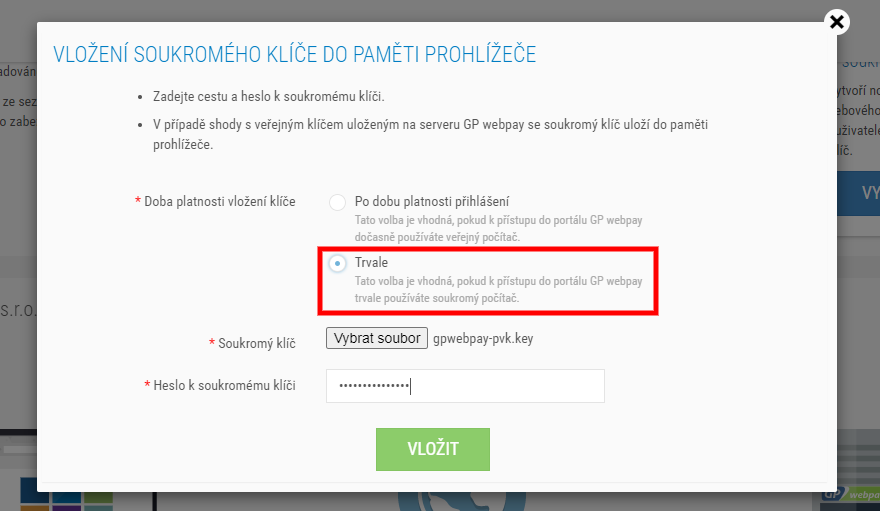
Subsequently, it is necessary to upload the key to the WordPress directory. Use the “Nahrát privátní klíč” (Upload private key) function in the plugin settings for this (see 3. Plugin Settings)
3. Setting Access Credentials in the Plugin
After creating keys in the GP Webpay administration, go to the GP webpay plugin settings, which you can find in Toret plugins > GP webpay. Here you need to insert the access credentials to connect the plugin with the payment gateway.
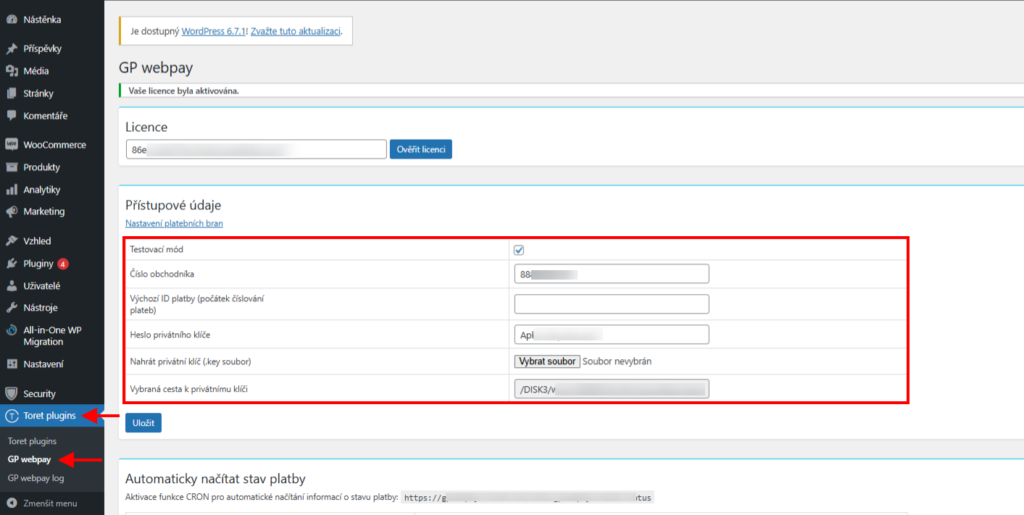
Testovací mód (Test mode) – activate/deactivate the test environment in this checkbox
Číslo obchodníka (Merchant Number) – enter the merchant number assigned to you in this field
Heslo privátního klíče (Private Key Password) – here you enter the password you created for the key
Nahrát privátní klíč (Upload Private Key) – via the “select file” button upload the created private key
Finally, do not forget to save the changes made. Then you can proceed to the payment method settings.
4. Payment Method Settings
Set the payment method in WooCommerce > Settings > Payments. The GP webpay payment method is a grouped payment method through which you can set all payment methods available for your payment gateway. This method is compatible only with the default WooCommerce checkout.
If you use a checkout with blocks (Gutenberg checkout) in your e-shop, you need to set up separate payment methods (e.g. GP webpay: Payment Card, GP webpay: Moneta Bank etc.)
Grouped Payment Method Settings
This is the GP webpay payment method. This payment method is compatible only with the default WooCommerce checkout, and you can set all available payment methods for this payment gateway through it.
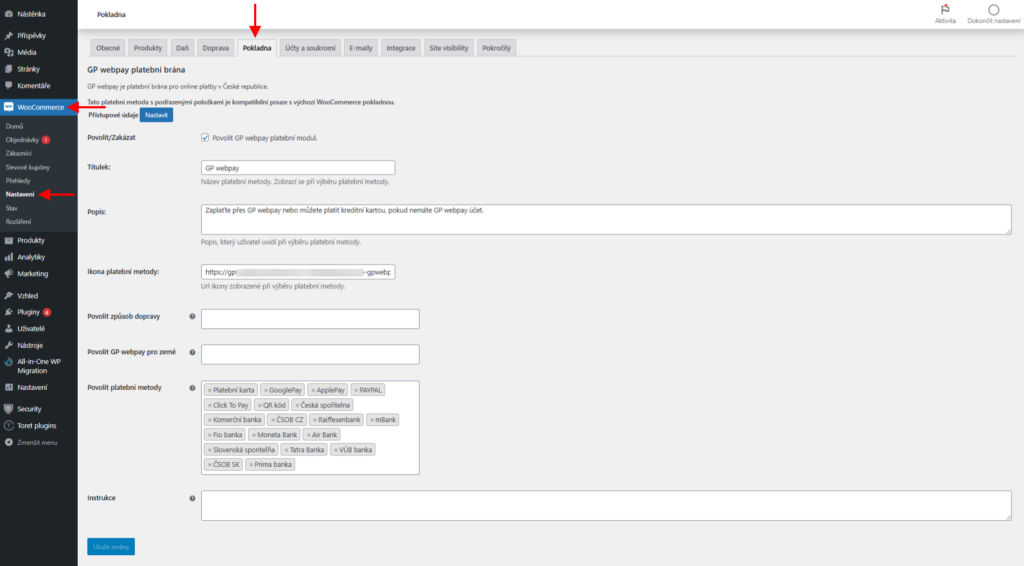
Povolit/Zakázat (Enable/Disable) – checking this box determines whether this payment method will be available to customers on the Checkout page or not
Titulek (Title) – here you can edit the name of the payment method as it will be displayed when selecting the payment method at checkout
Popis (Description) – in this field, you can describe instructions for payment to the customer
Ikona platební metody (Payment Method Icon) – if you want your own payment method icon, enter its URL here. Otherwise, the default icon from the plugin is set.
Povolit způsob dopravy (Enable Shipping Method) – if you want to enable all shipping methods, leave this field empty. Alternatively, you can define only some shipping methods for the payment gateway.
Povolit GP webpay pro země (Enable GP webpay for Countries) – specify for which countries the gateway will be available
Povolit platební metody (Enable Payment Methods) – set the payment methods you want to display to the customer in the checkout
Instrukce (Instructions) – write payment instructions here, which will be displayed on the Thank You page and in the confirmation email
After filling in the details, don’t forget to click the Uložit změny (Save Changes) button.
Separate Payment Methods Settings
Separate payment methods (e.g. GP webpay: Payment Card, GP webpay: Moneta Bank etc.) need to be set if you use a checkout with blocks (Gutenberg checkout). Perform the settings similarly for all methods you want to offer in the checkout.
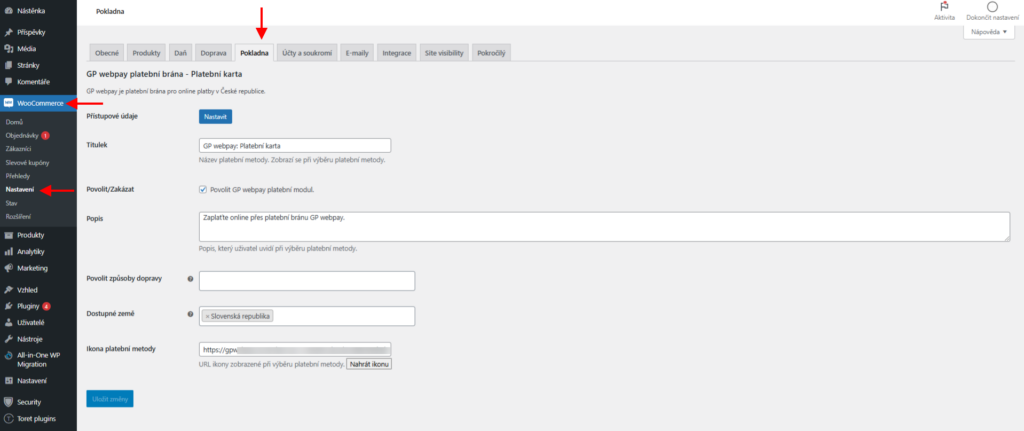
1. Titulek (Title) – here you can edit the name of the payment method as it will be displayed when selecting the payment method at checkout
2. Povolit/Zakázat (Enable/Disable) – checking this box determines whether this payment method will be available to customers on the Checkout page or not
3. Popis (Description) – in this field, you can describe instructions for payment to the customer
4. Povolit způsob dopravy (Enable Shipping Method) – if you want to enable all shipping methods, leave this field empty. Alternatively, you can define only some shipping methods for the payment gateway.
5. Dostupné země (Available Countries) – specify for which countries the gateway will be available
6. Ikona platební metody (Payment Method Icon) – if you want your own payment method icon, enter its URL here. Otherwise, the default icon from the plugin is set.
Do not forget to save the changes made. Perform this setting for all methods you want to offer in the checkout.
5. Test Payments
After configuring integration and plugin settings, perform test payments with a test payment card:
Test payment without authentication:
4056070000000016, Exp. 12/33, CVV2 442
5213000000000028, Exp. 12/33, CVV2 365
Test payment with authentication:
4056070000000008, Exp. 12/33, CVV2 992
5434021016824014, Exp. 12/33, CVC2 277
6. Transition to Production Environment
After performing test payments, contact the payment gateway provider at gpwebpay@gpe.cz. After checking the integration, you will receive an email from the payment gateway with access to the production environment. Here you will create a new production private key (similar to step 2 for test environment).
You will need to upload the new private key again via the GP webpay plugin settings to the WordPress directory. In case you chose a new password for the private key, also save the new password in the plugin and then turn off the Test checkbox in the plugin settings. (see step 3 Plugin Settings)
Automatic Payment Status Loading
Upon payment completion, the customer is redirected to the thank you page. At the same time, a notification that the order has been paid is transmitted, and the order status changes to Processing (for physical products) or Completed (for virtual products).
However, it may happen that the customer was not redirected to the thank you page for some reason after paying for the order. In that case, the plugin has no information from the payment gateway that the order has been paid. To prevent paid orders without notification from being cancelled by WooCommerce functionality, it is necessary to set up the automatic payment status loading function.
You can find the automatic payment status loading settings under the tab Toret Plugin → GP webpay.
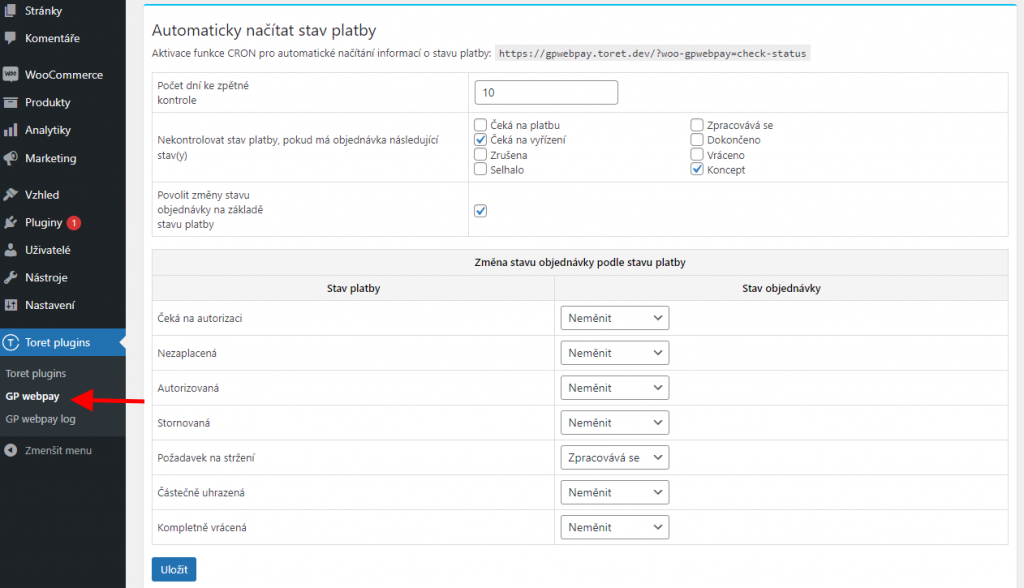
1) Set the number of days for retrospective payment status checks, i.e., in what retrospective time horizon orders will be checked.

2) If you do not want to check the payment status for all orders, you can select individual order statuses to exclude from the check. We definitely do not recommend excluding Pending payment (Čeká na platbu), Failed (Selhalo), and Cancelled (Zrušeno).

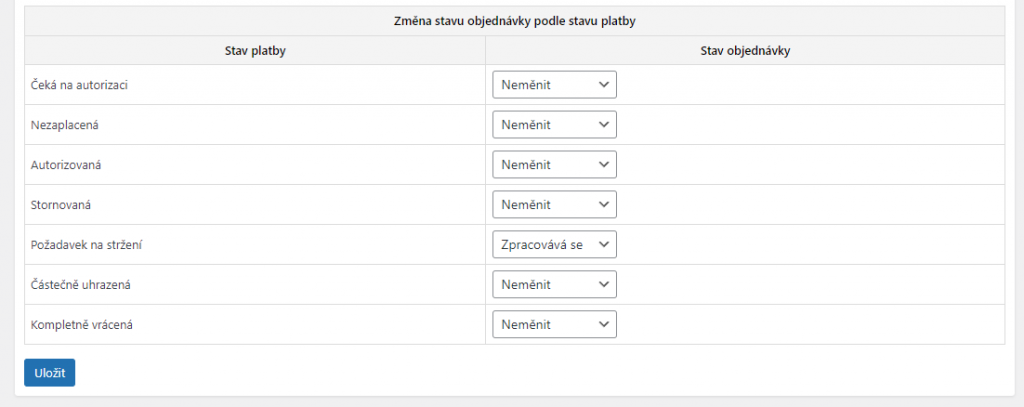
3) Setting order status change based on payment status.
The function for changing the order status based on the payment status must be enabled by activating the checkbox and saving.

In case you want to change the order status e.g. to “Processing” after payment confirmation, you need to set it for the “Požadavek na stržení” (Request for deduction) payment status. In the “Požadavek na stržení” (Request for deduction) payment status, the order is considered paid.
4) For payment statuses to update according to the settings from the previous three points, it is necessary to set up the CRON URL listed in your site settings on your hosting. We recommend running CRON regularly, at least once per hour.

Test Payment Card
Test payment without authentication:
- 4056070000000016, Exp. 12/33, CVV2 442
- 5213000000000028, Exp. 12/33, CVV2 365
Test payment with authentication:
- 4056070000000008, Exp. 12/33, CVV2 992
- 5434021016824014, Exp. 12/33, CVC2 277
Plugin testing
For testing purposes, you can use:
- the subdomain “dev.domainlicense” (with the same license as for the production website)
- localhost (127.0.0.1)
Purchased plugins will also work in these locations, and you can test their implementation and compatibility here before deploying them to the website and during its use.
FAQ
I want sequential order numbering
The plugin is compatible with Custom Order Numbers for WooCommerce.
Connection doesn’t work even though I entered everything correctly
Check if your password contains special characters (for example < or >). WordPress handles these characters by parsing them, which can cause invalid password verification.
In case of a password with a special character, we recommend regenerating it.
PRCODE=3, SRCODE=7: Unsupported currency
This error occurs after redirection to the payment gateway if you do not have the currency in which the order was made active in GP webpay.
Contact GP webpay support to enable the used currency for your account.