You are on the documentation page for the plugin that integrates the GLS service into your e-shop. You can purchase the GLS plugin here: Toret GLS for WooCommerce
- Plugin Installation
- Plugin Activation
- Connecting to GLS
- General Settings
- Setting up Carriers in the GLS Plugin
- Shipping Zone Settings
- Shipment Submission from Web to GLS
- Printing Labels
- Shipment Tracking
- Order Status Change Based on Shipment Status Change
- Exchange Rate Settings
- Package Synchronization
- Product Level Settings
- Filters
- FAQ
- Testování pluginu
Plugin Installation
Upon purchasing the plugin, you will receive a license key and a download link for the plugin zip file via email. You can find detailed instructions on how to install the plugin from your computer into WordPress here.
Plugin Activation
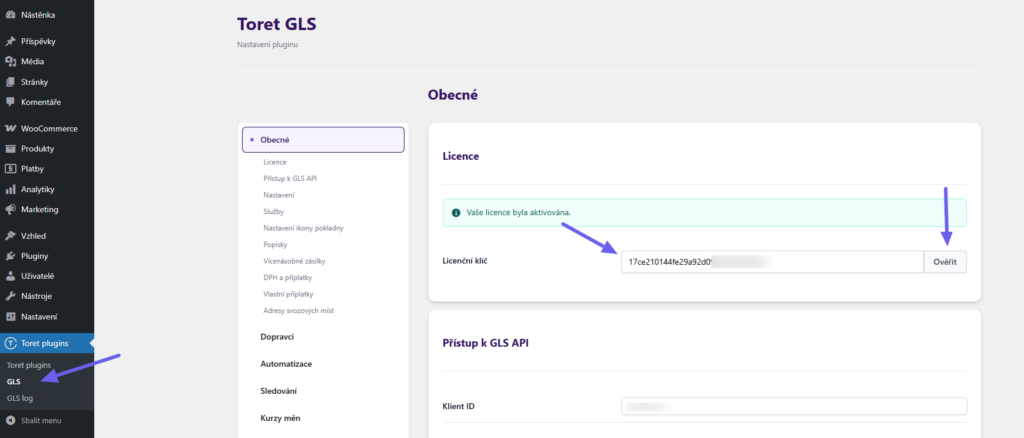
After installing the plugin, open the Toret GLS plugin, insert the license key into the appropriate field, and click the button to activate.
Connecting to GLS
To use the Toret GLS plugin, you must have an account created with MyGLS (e.g. https://mygls.sk/, https://mygls.cz/).
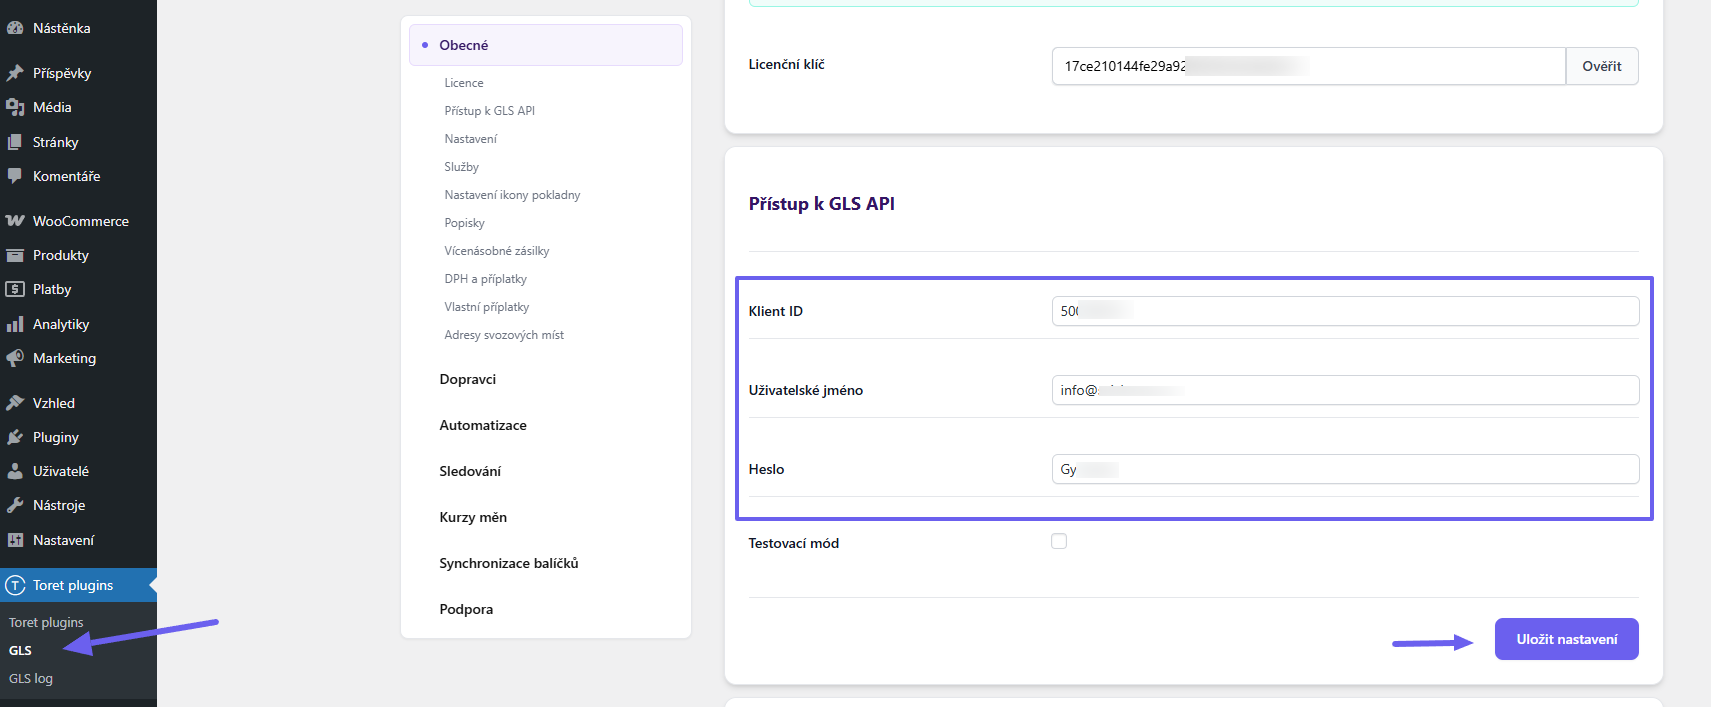
To connect the plugin to the API, implementation data will be needed:
- Client ID (screen below)
- Username (email for logging into GLS administration)
- Password (password for logging into GLS administration)
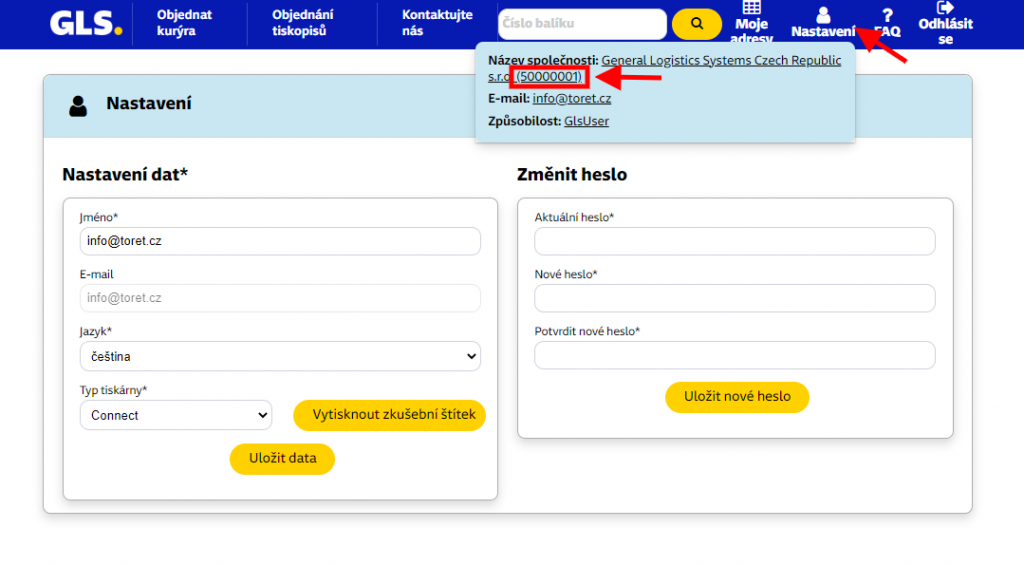
The Client ID is listed in the GLS administration in the “Nastavení” (Settings) section in parentheses after the company name.
Enter the implementation data in the plugin settings Toret plugin → GLS → Obecné (General).
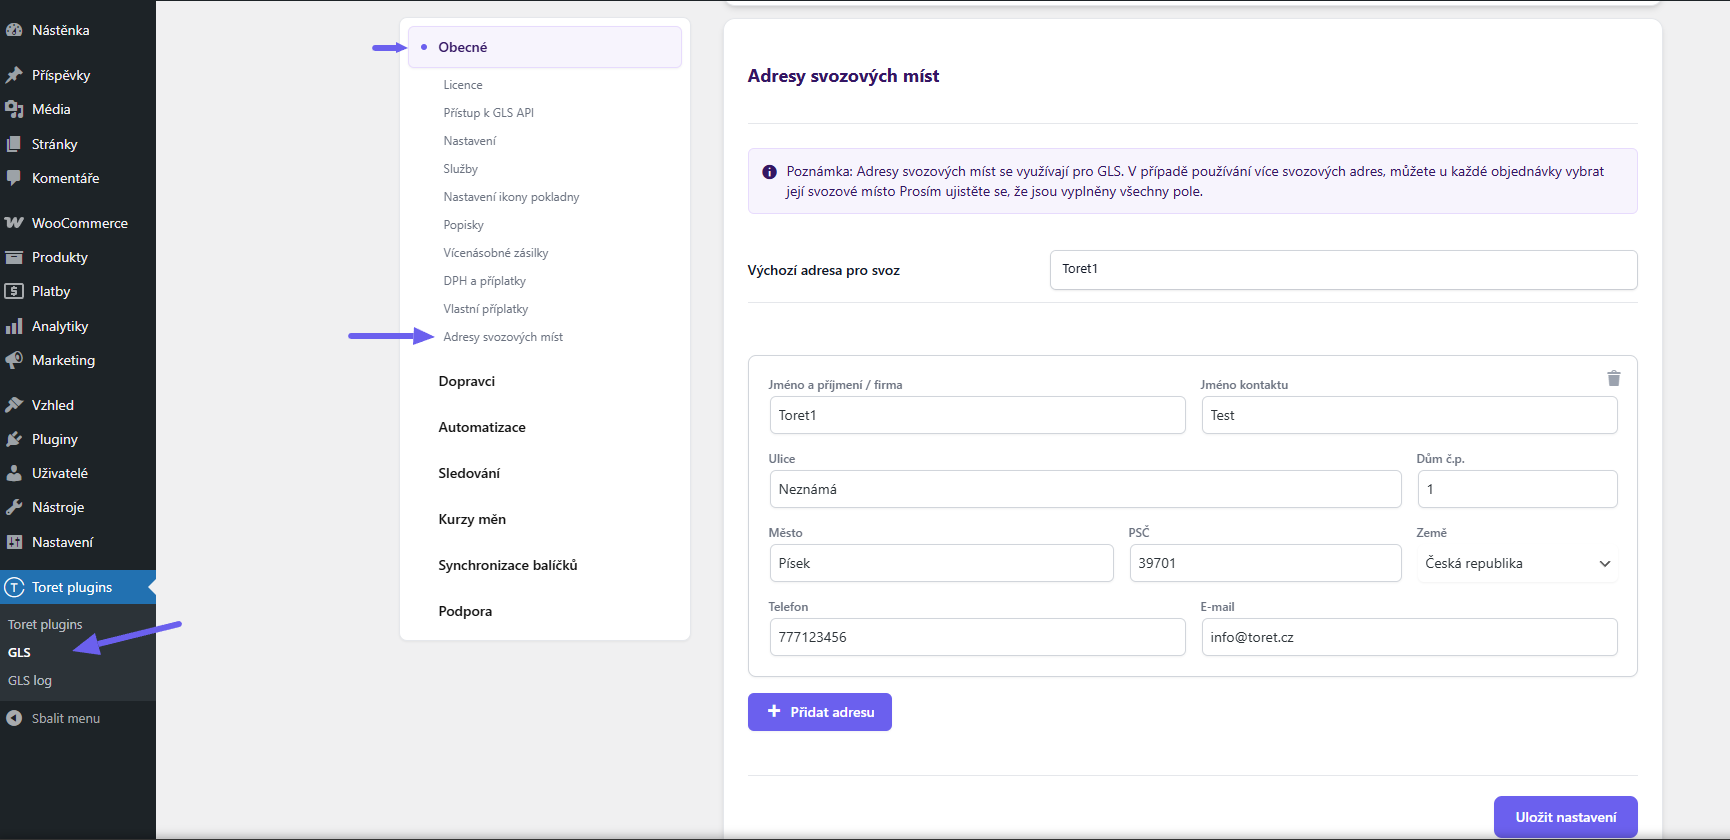
Another mandatory setting is filling in the data for package pickup. This is the place where GLS will pick up the submitted packages. (Toret plugin → GLS → Obecné)
General Settings
You can find the following functions on the Obecné (General) tab (Toret Plugins > GLS > Obecné).
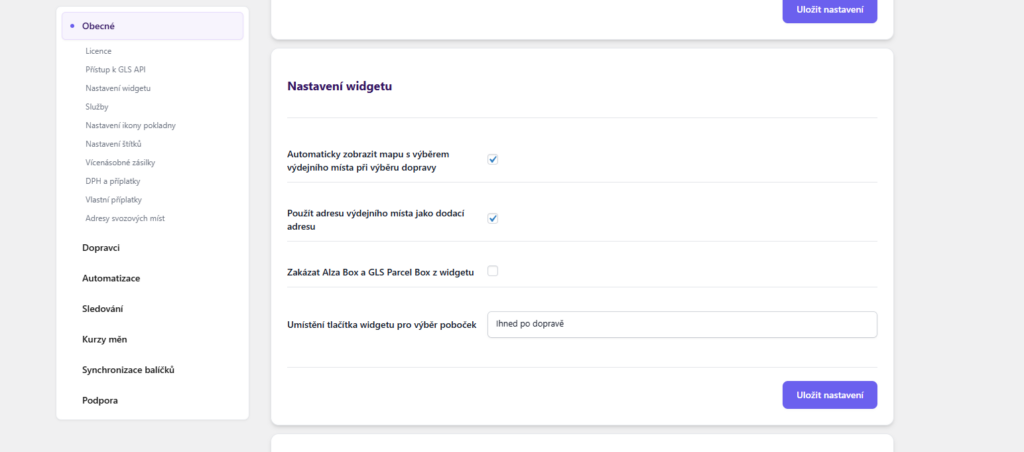
Widget Settings
Here you can adjust the plugin behavior concerning the map widget in the checkout:
- Automatically display map with pickup point selection when choosing shipping – automatically opens the widget when selecting GLS Parcelshop, the customer does not have to click the button
- Use pickup point address as delivery address – the customer does not have to fill in the address when delivering to a pickup point
- Disable Alza Box and GLS Parcel Box from the widget
- Branch selection widget button placement – can be placed directly under the given method or under the list of methods
Services
In this section, you set up additional delivery services offered by GLS. More information about additional services can be found on the GLS website. These services must first be contracted with GLS!
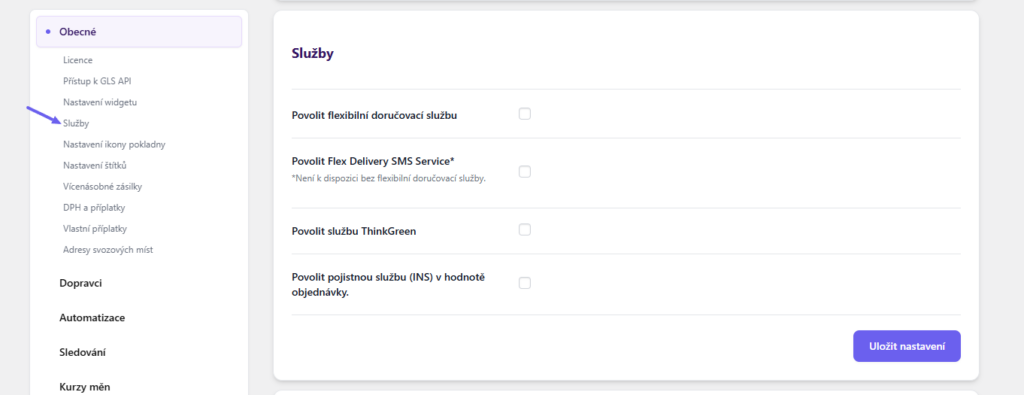
- Enable Flexible Delivery Service
- Enable Flex Delivery SMS Service – allow SMS notification for flexible delivery service (can be enabled only when flexible delivery service is active)
- Enable ThinkGreen Service (eco-friendly delivery)
- Enable Insurance Service (INS) at order value
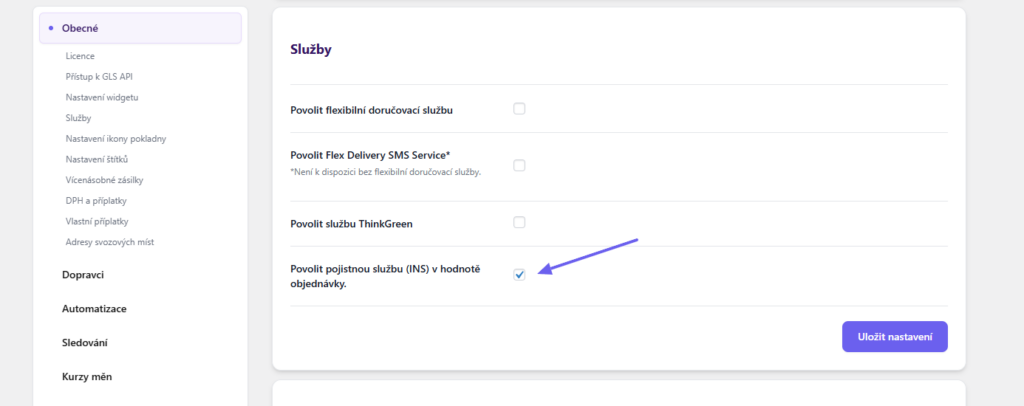
Shipment Insurance (INS)
Shipment insurance (DeclaredValueInsuranceService) can be activated for all orders in the plugin settings (Toret plugins > GLS > Obecné nastavení > Služby > Povolit pojistnou službu (INS) v hodnotě objednávky). In such a case, all packages will be insured to the order value upon submission.
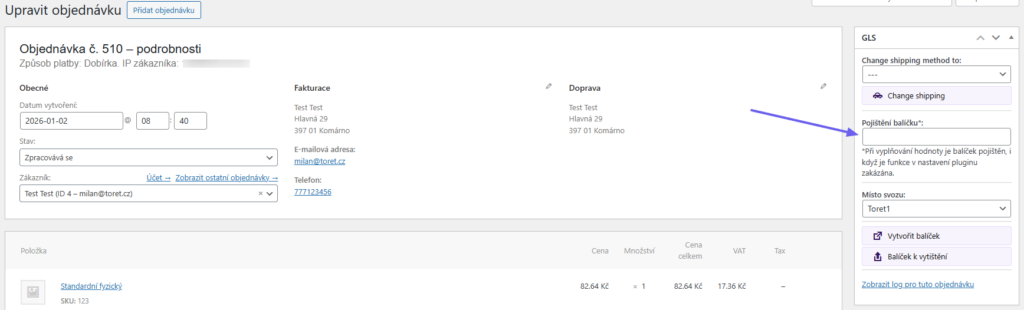
Packages can also be insured individually in the order detail. Simply fill in the amount in the appropriate field in the metabox. When filling in the value, the package is insured even if the function is disabled in the plugin settings.
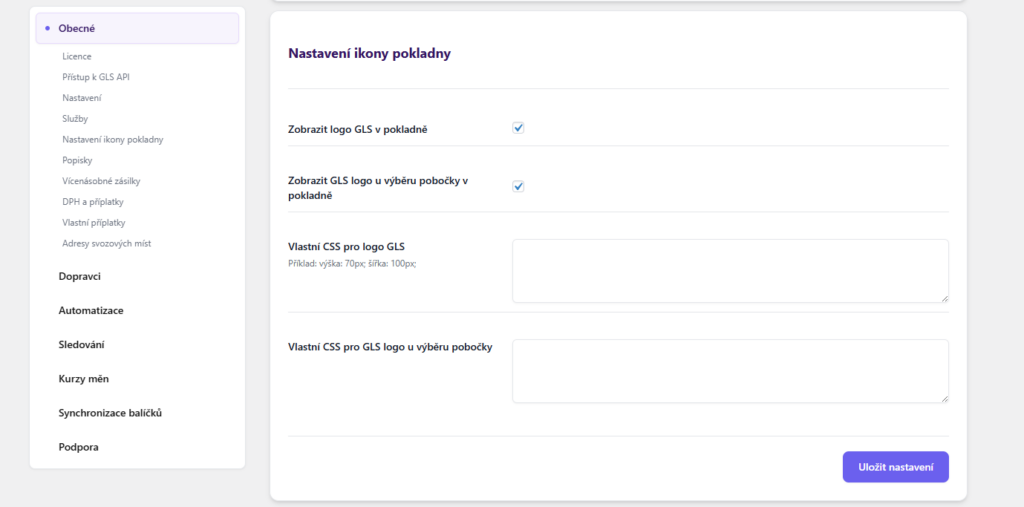
Checkout Icon Settings
In this section, you can set whether icons will be displayed for shipping methods and branch selection, and style them using CSS. The plugin includes preset carrier logos. Custom icons can be uploaded in the individual shipping settings (see below).
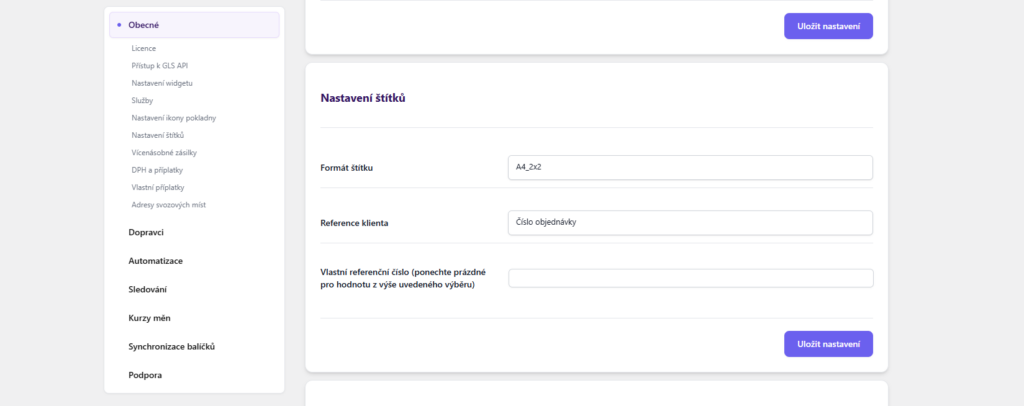
Label Settings
In this section, you set the label format and references:
- Label format (A4 4×1, A4 2×2, Connect or Thermo)
- Client reference – i.e., data that will be written on the label – you can choose the order number or ID, product SKU, or data from the iDoklad plugin
- Custom reference number to be included on the label
Multiple Shipments
The plugin allows you to set automatic splitting of an order into multiple packages based on weight. Just enable the function by checking the checkbox and enter the threshold, above which another shipment will be created. You can also enter the packaging weight, which is automatically added to each shipment.

VAT and Surcharges
In this section, you set whether shipping prices will be set with VAT or without. You can also choose the tax class for the COD fee (fixed or based on cart content) and set hiding the COD fee if it is free.

Custom Surcharges
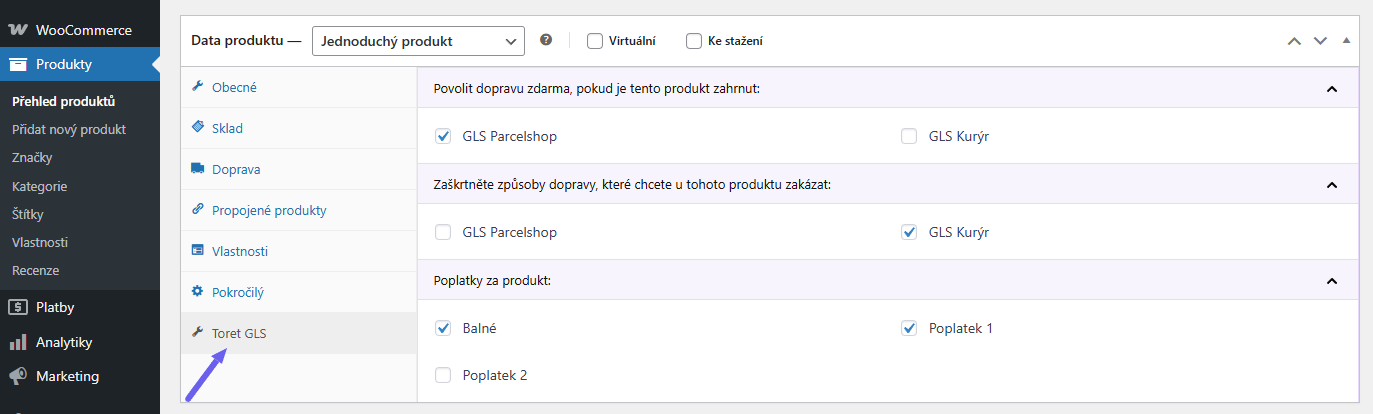
In this section, you can set custom surcharges per product or per order (global). Fees can be set as visible or hidden and choose whether they will be multiplied (by the number of items in the order/number of products).

If you set a surcharge for a product, it must be enabled in the product detail for which it should be counted. (Product > Product Data >Toret GLS > Product Fees)

Pickup Addresses
Here you can enter the address(es) where the GLS pickup should collect the shipments. Multiple addresses can be entered, between which you can then switch when sending.
Attention! Without entering pickup place addresses, it will not be possible to send shipments.

Setting up Carriers in the GLS Plugin
In the Toret GLS plugin, you can set up shipping:
GLS Kurýr (Courier) (delivery to address)
GLS Courier enables delivery to address to 22 countries (Czech Republic, Slovakia, Germany, Poland, Austria, Belgium, Denmark, France, Netherlands, Luxembourg, Hungary, Slovenia, Bulgaria, Estonia, Ireland, Italy, Latvia, Spain, Romania, Finland, Portugal, Sweden).
GLS Parcelshop (delivery to pickup point)
The GLS Parcelshop shipping service can be set for 6 countries (Czech Republic, Slovakia, Hungary, Slovenia, Romania, Croatia). Branch import is not necessary. The branch selection widget is located on our server, and we take care of regular branch updates.
Perform the settings in the plugin administration, in the “Dopravci” (Carriers) section. Here you will find a list of countries and active carriers. By clicking the pencil button in the “Akce” (Actions) column (A), you can set individual shipping methods for the given country. In the “Globální nastavení” (Global Settings) row (B), shipping values can be set in bulk for all countries. This setting applies to empty fields for enabled countries.
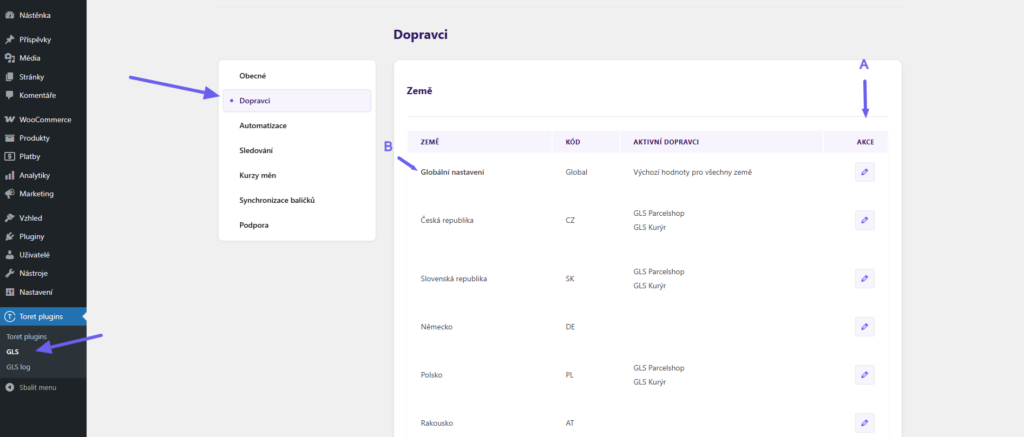
Attention! Shipping setting options are limited in global settings. More detailed (e.g., price scaling, icons) settings are available in the settings for specific countries.
Activating Shipping Method
After clicking on a country (or global settings), select in the left column whether you want to set up GLS Parcelshop or GLS Kurýr (A). Activate the carrier by checking the checkbox (B).
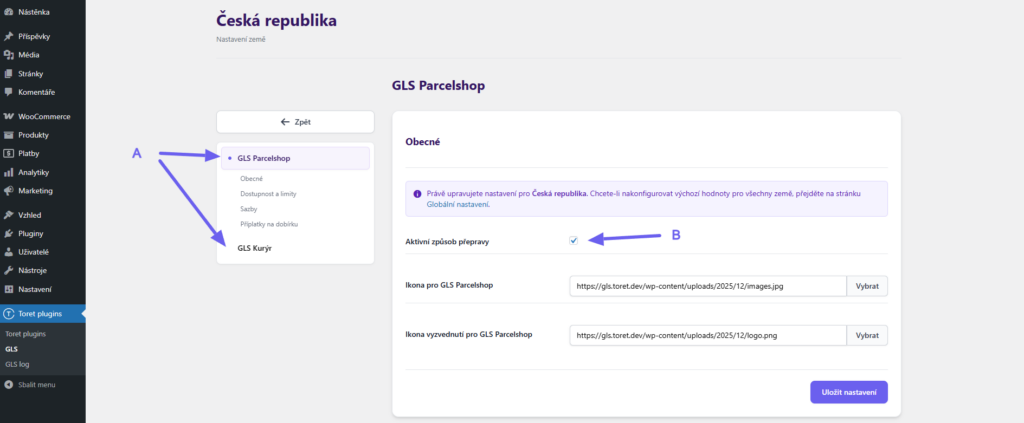
Now the following options can be set for the carrier:
Custom Icons
- for shipping method
- for pickup (displayed at the widget opening button – for GLS Parcelshop only)
Attention! To use custom icons, it is necessary to enable icon display in the checkout in the general settings. (Toret plugins > GLS > Obecné > Nastavení ikony pokladny)
Availability and Limits
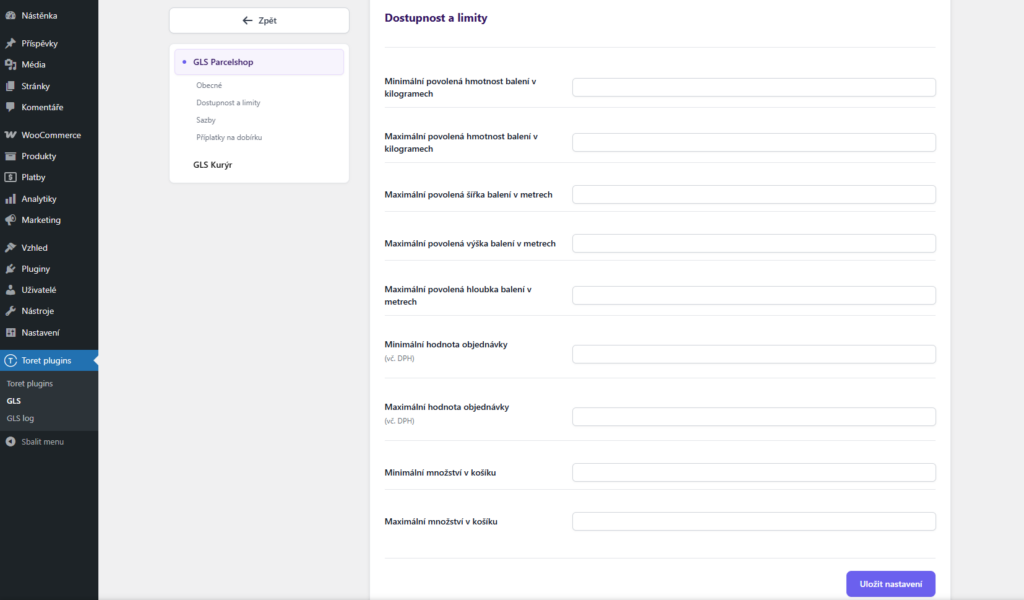
- Minimum allowed package weight in kilograms
- Maximum allowed package weight in kilograms
- Maximum allowed package width in meters
- Maximum allowed package height in meters
- Maximum allowed package depth in meters
- Minimum order value (incl. VAT)
- Maximum order value (incl. VAT)
- Minimum quantity in cart
- Maximum quantity in cart
If the order does not meet your specified criteria, the shipping method will not be offered at checkout.
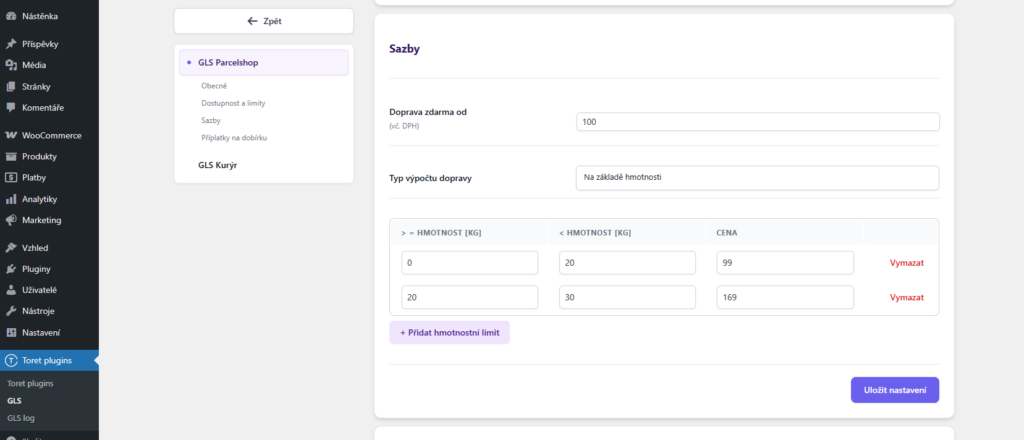
Rates (Shipping Price)
- free shipping from [order value]
- shipping calculation type (flat price, scaled by order weight or dimensions)
- fields for entering price / scaling limits
- flat rates in foreign currencies (these shipping prices will be used for orders in a currency other than the e-shop’s primary currency)
Free Shipping
You set free shipping directly in the GLS plugin for each carrier of the selected country. The free shipping plugin setting starts already “FROM” the set value.
EXAMPLE: If you want free shipping from 500, set the amount 500 in the plugin.
In case you are a VAT payer, have tax and tax classes set in WooCommerce, and have checked setting prices incl. VAT in the GLS plugin, set the free shipping value incl. VAT. In case you do not have entering prices incl. VAT enabled in the plugin and you are a VAT payer, set the free shipping value without VAT as well.
The free shipping amount setting applies only to products; the shipping price is not included.
EXAMPLE: If you have free shipping set from 500, and the cart contains a product for 450 + shipping price 65 = 515 CZK, free shipping will not be activated. It is necessary for the value of products in the cart to be at a minimum value of 500 CZK.
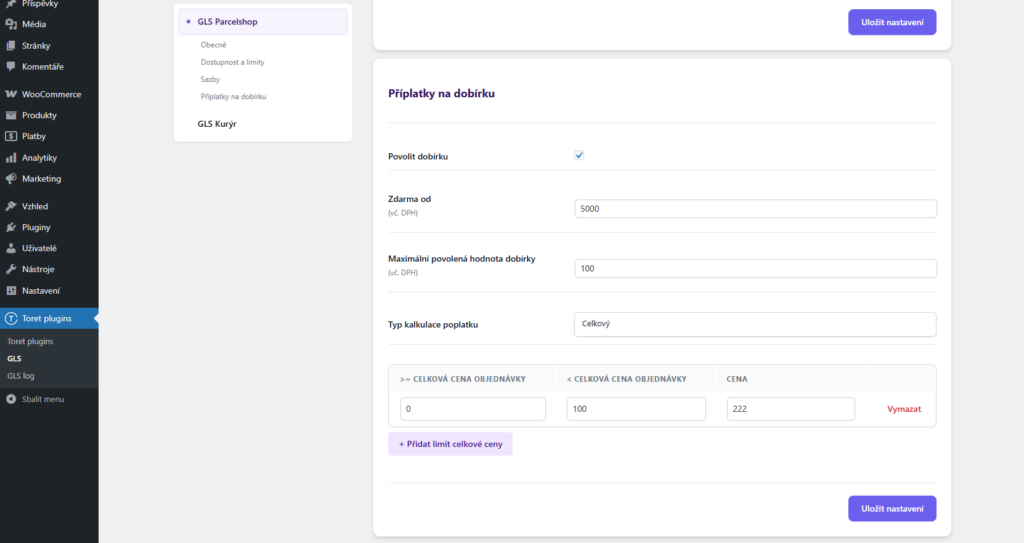
COD Surcharges
To enable cash on delivery for a given shipping method, activate it by checking the “Povolit dobírku” (Enable COD) checkbox. Subsequently, you can set:
- Free from (incl. VAT) – from the entered order price, COD will be without surcharge
- Maximum allowed COD value (incl. VAT) – from the entered order price, COD will not be offered at checkout
- Fee calculation type – it is possible to choose a flat price or scale the price according to the total order value
- Fields for entering price / scaling limits
- Flat rates in foreign currencies (these COD prices will be used for orders in a currency other than the e-shop’s primary currency)
Shipping Zone Settings
After setting up carriers in the Toret GLS plugin, it is also necessary to set up identically named carriers in WooCommerce shipping zones. Without setting them in shipping zones, carriers from the GLS plugin will not appear at checkout.
It is necessary to have a created shipping zone to which the shipping method from the GLS plugin will be added. Set the shipping method in WooCommerce > Settings > Shipping > required shipping zone > Add shipping method.
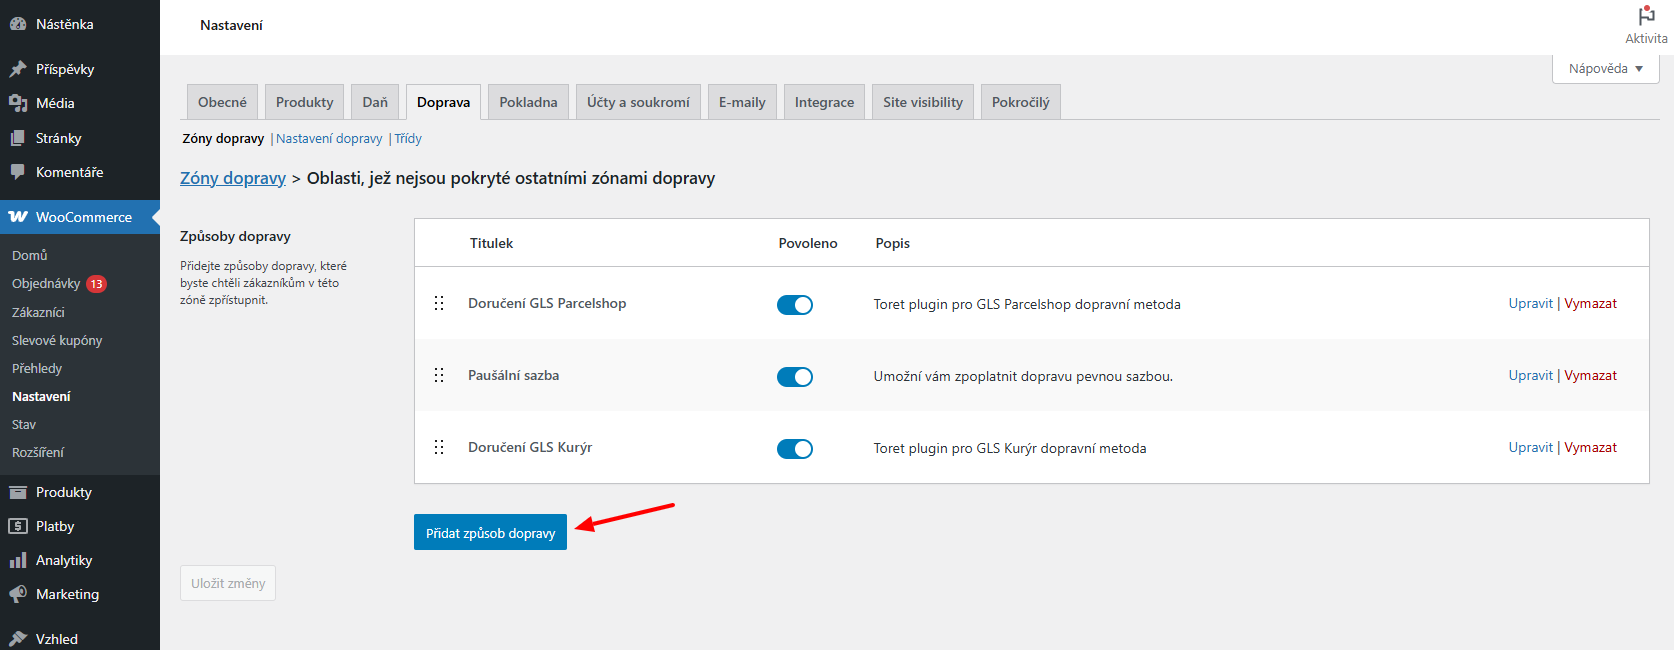
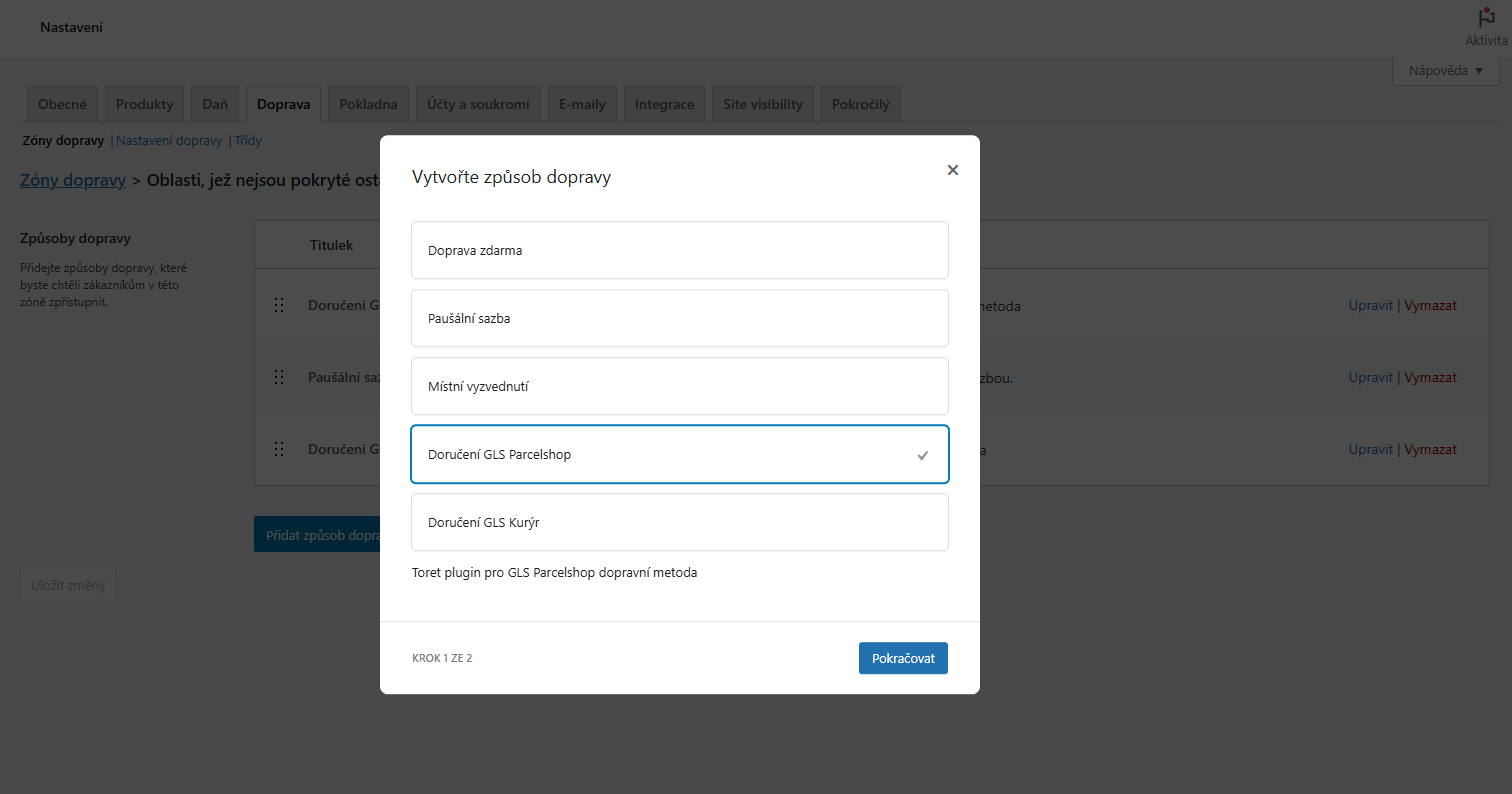
Select from the offered shipping methods and click Continue.
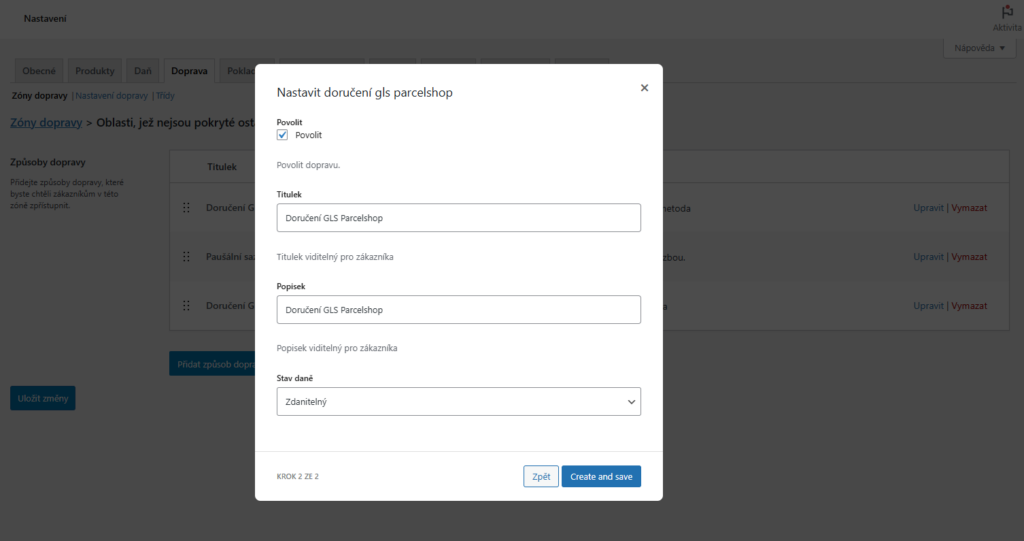
In the next step, choose the Title and Description of the shipping method and Tax Status (Taxable or None). Click Create and save. The new shipping method is created.
Shipment Submission from Web to GLS
You have three options for submitting a shipment to the GLS system in the plugin. Shipments sent via the plugin can also be found in your MyGLS account.
Attention! Submission will automatically order a pickup, so submit shipments when you are ready to physically hand over the package to the carrier.
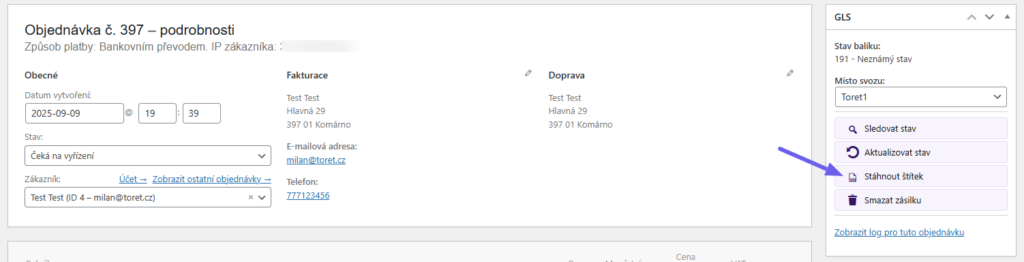
1. Manual submission via a button in the order overview or in the order detail.


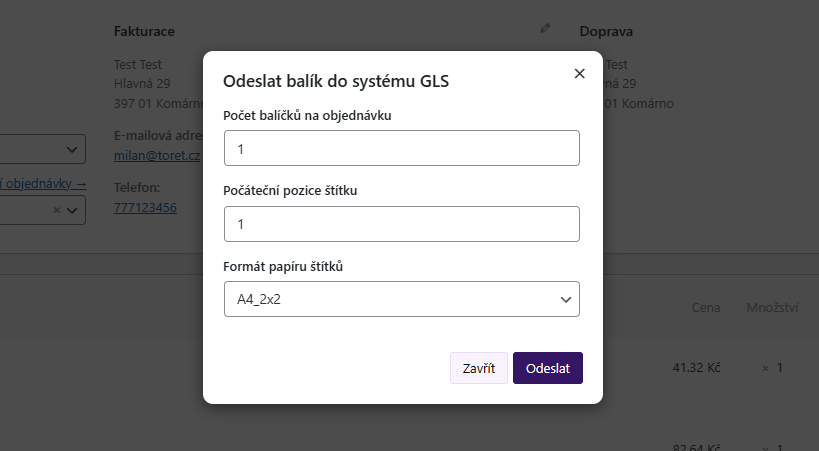
Clicking the manual submission button opens a window with label print position selection, number of packages, and label format. After submitting the package, the label is automatically downloaded. The generated label can be downloaded repeatedly via the PDF document icon. More about printing labels in the “Printing Labels” chapter.
2. Bulk Submission
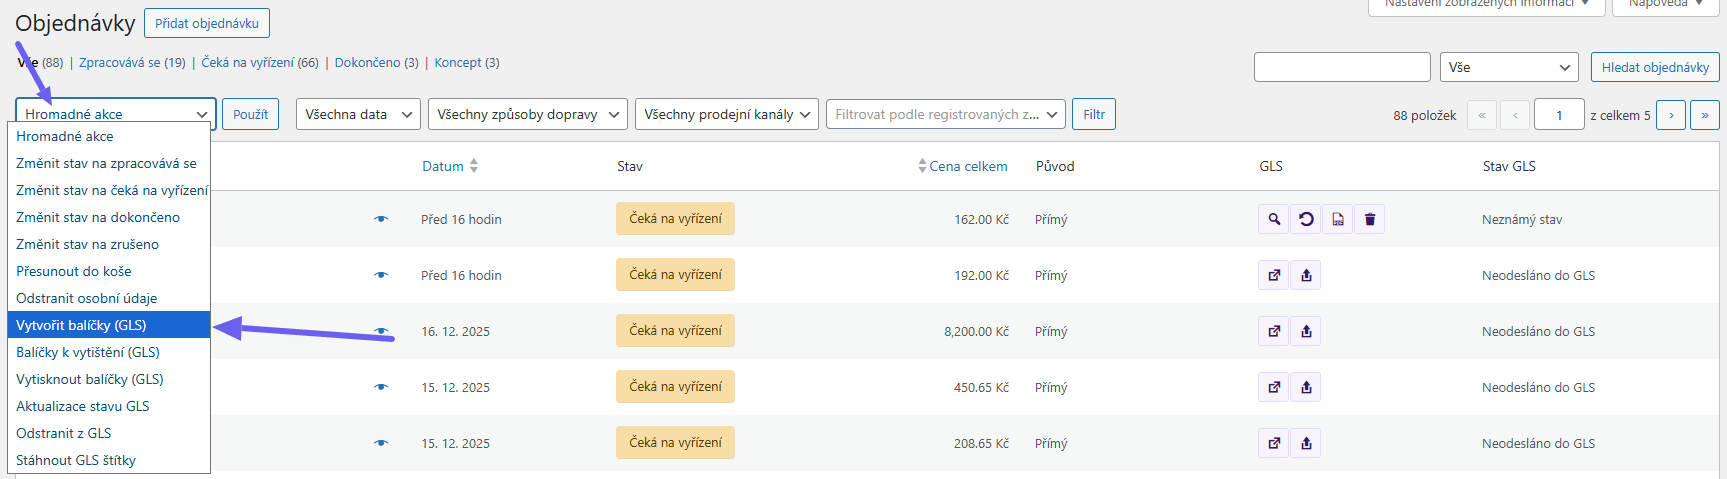
Via bulk actions in the order overview, multiple orders can be submitted to GLS at once. Just select the orders for submission and use the bulk action “Vytvořit balíčky (GLS)” (Create packages (GLS)).
After using bulk submission, a window with submission settings opens. After submitting the package, the label is automatically downloaded again. The bulk label can be downloaded again via the PDF document icon for an order that was part of the bulk submission. In case of necessity to print a label for one order that was part of the bulk submission, it is necessary to delete the submitted shipment via the trash icon and submit it again individually.
3. Automatic submission on order status change
Automatic submission can be set in the GLS plugin → section Automatizace (Automation).
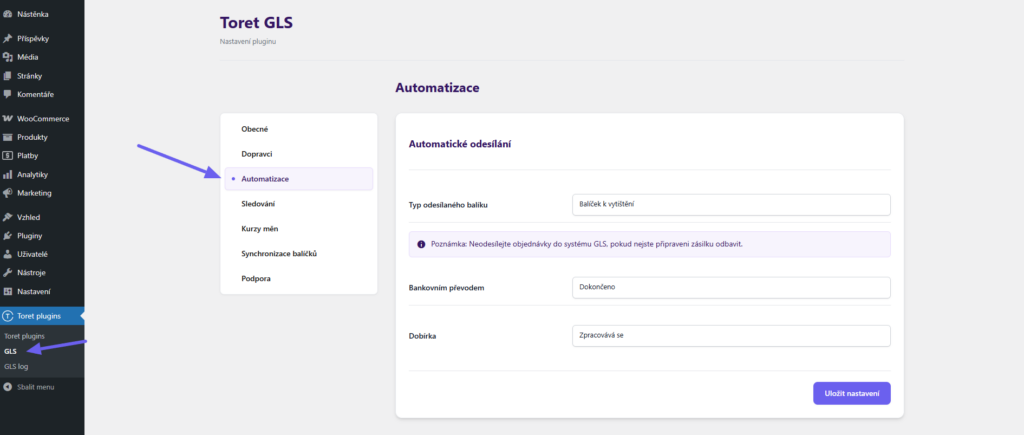
The Typ odesílaného balíku (Sent package type) field allows selecting:
- Vytvořit balíček (Create package) – sends shipment data to the GLS system
- Balíček k vytištění (Package to print) – sends shipment data to the GLS system and queues the package for printing (for bulk printing from MyGLS account – see Printing Labels)
Attention! We recommend using automatic submission with label printing only when the label format is set to Connect or Thermo. Other labels are created in a 1/4 A4 page ratio (so the label would always be printed in the first position).
Subsequently, select the order status for each payment method in which the shipment will be automatically submitted.
Attention! Submission will automatically order a pickup, so set the submission so that you are ready to physically hand over the package to the carrier.
Printing Labels
It is possible to print labels for shipments that have already been submitted to the GLS system. Printing is possible from the overview (PDF file icon) and the order detail.

Bulk Label Printing from Administration
Bulk label printing from the e-shop administration is possible only for orders that were submitted by one bulk action. You download the bulk label for any order from the given bulk submission.
Bulk Label Printing from MyGLS Account
If you want to bulk print labels for shipments that will be submitted separately, it is possible to print directly from your MyGLS account. In this case, use the function Balíček k vytištění (Package to print) (instead of Create package) for submission. The Package to print function sends shipment data and simultaneously queues the shipment for printing in your MyGLS account, from where you can then print the labels.
The Package to print function can be found in the overview and detail of orders, in bulk actions, and can also be set for automatic submission (see above).


Shipment Tracking
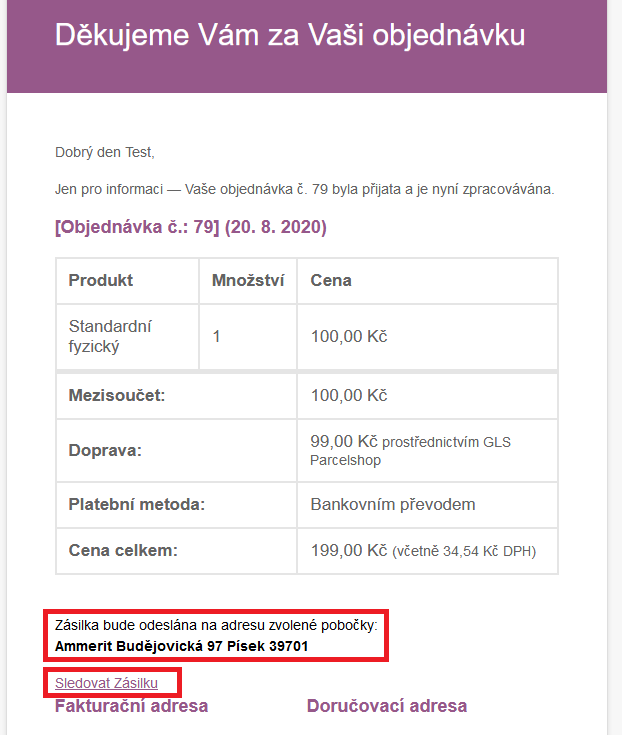
After creating an order, a tracking link is available, or information about the selected GLS Parcelshop branch:
- in automatic emails for customers
- in order administration
Tracking Link
Display in email
The first email sent after order creation contains only the branch name without a tracking link. The shipment tracking link appears in the email that arrives only after the order status changes to “Processing”.
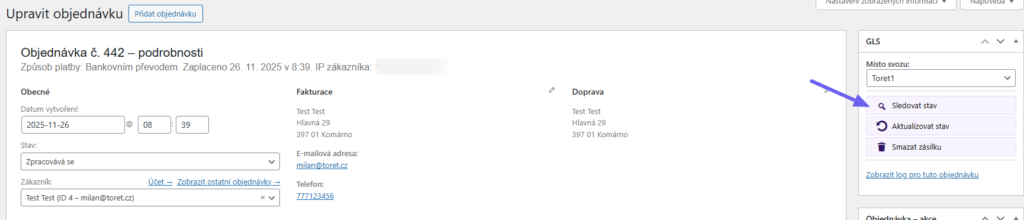
Display in order administration (Woocommerce → Orders)
You can find the tracking link in the order overview and in the order detail under the magnifying glass icon.

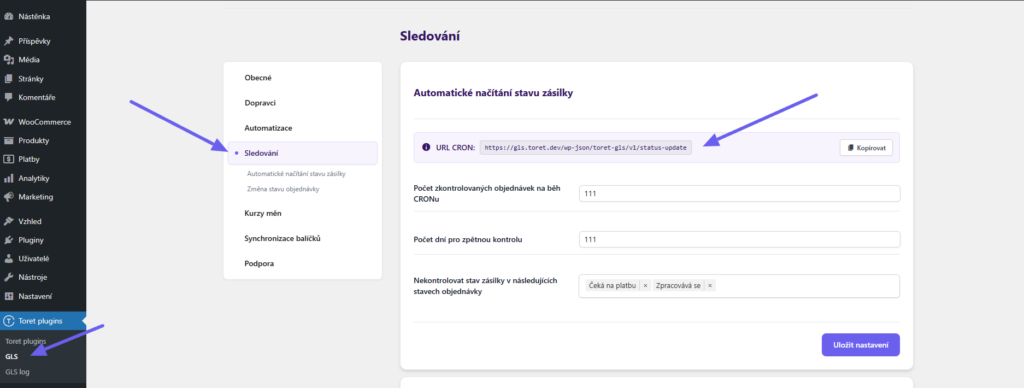
Automatic Shipment Status Loading
To see the current status of each order, you can load it either manually (by clicking the update status button in the order overview or detail) or load it automatically using CRON.

Url for CRON can be found directly in the plugin settings in the “Sledování” (Tracking) section (Toret plugins > GLS > Sledování) and you set it on your hosting.
In the Tracking section, also set how many orders will be checked per run, the number of days for retrospective checks, and exclude order statuses that will not be checked.
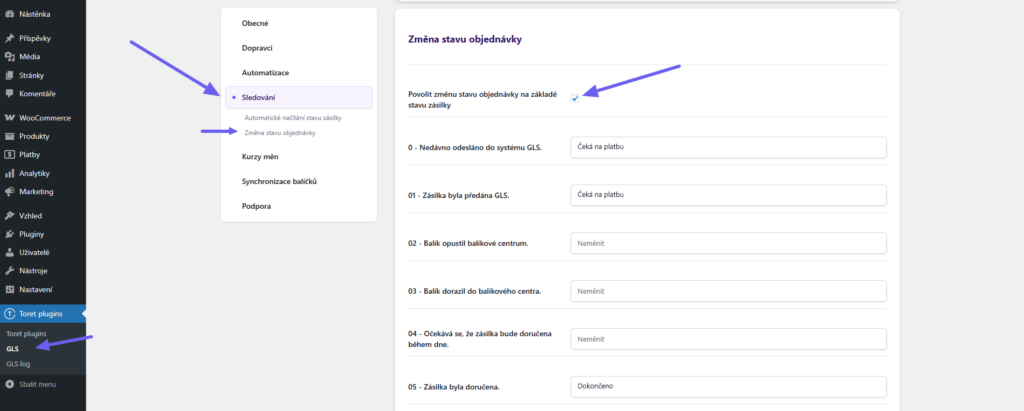
Order Status Change Based on Shipment Status Change
In the Tracking section, you can further enable changing the order status according to the shipment status. Activate the function below on the page and assign GLS shipment statuses to the desired WooCommerce order statuses (in the dropdown). For this function, we recommend having automatic shipment status loading active.
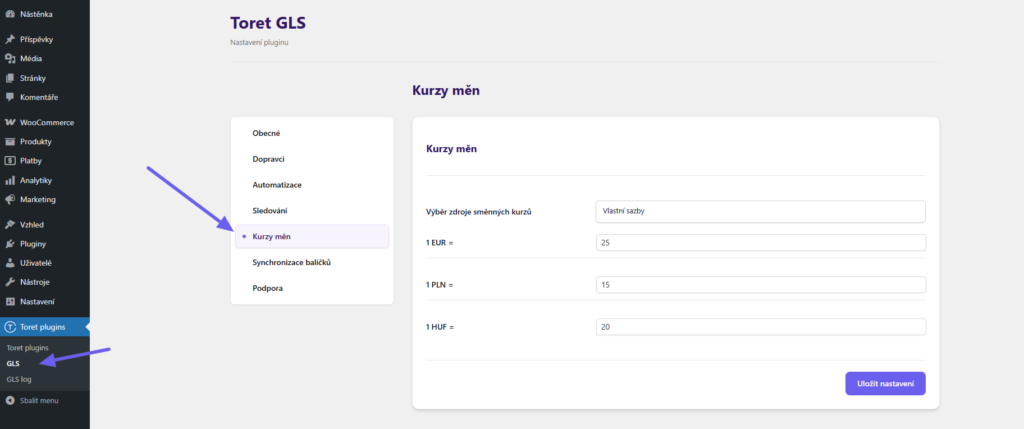
Exchange Rate Settings
Exchange rates need to be set if you ship abroad. You can load rates from the Czech National Bank, the National Bank of Slovakia, or set custom ones. Perform the settings in the “Kurzy měn” (Currency Rates) section in the plugin administration (Toret Plugins > GLS > Kurzy měn).
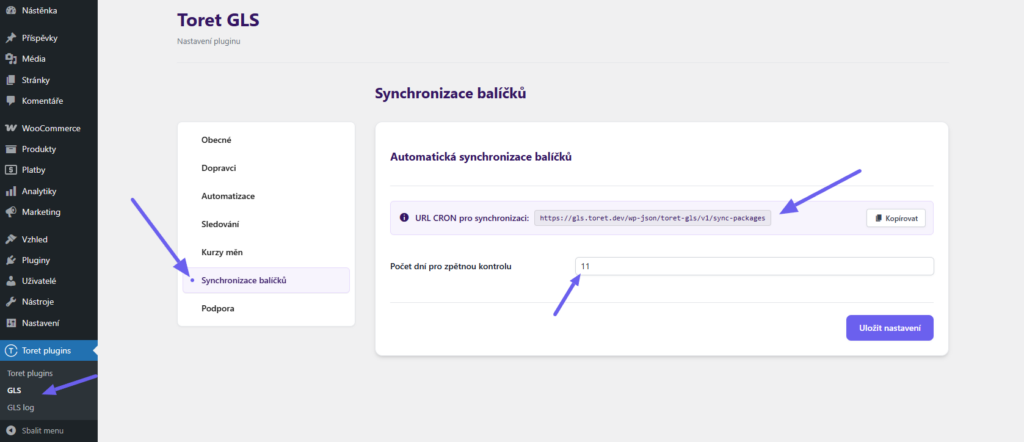
Package Synchronization
The Package Synchronization function is used to connect shipments created directly in the MyGLS system (i.e., not in the e-shop administration) with orders. For synchronization, it is necessary to:
a. Use the order ID as the reference number when creating the shipment
b. Set up CRON on your hosting
The CRON URL can be found in the plugin settings in the “Synchronizace balíčků” (Package Synchronization) section. In addition to CRON, also set the number of days for retrospective checks here.
TIP: If you create shipments only via the plugin, there is no need to set this function.
Product Level Settings
In the product detail, you can:
- set free shipping for the given product
- disable shipping methods for the given product
- assign product surcharges to the given product
You can find the settings when editing a specific product in the Product Data box and the Toret GLS tab.
If the order consists of multiple products and at least one product has shipping disabled/free shipping set, this setting applies to the entire order.
Filters
- tgls_create_parcel and tgls_custom_client_reference for creating a package with a custom customer reference
Testování pluginu
Pro účely testování můžete využít:
- subdoménu “dev.doménalicence” (se stejnou licencí jako pro produkční web)
- localhost (127.0.0.1)
Na těchto umístěních budou zakoupené pluginy fungovat také a můžete zde otestovat implementaci a kompatibilitu před ostrým nasazením na web i v průběhu jeho užívání.
FAQ
Debugging Errors
Since things can always go wrong, the plugin has a built-in way of catching errors.
In the order detail where the error occurred, you will find the GLS log in the upper right corner, which applies only to the specific opened order.

In the Toret plugins overview, you will find the GLS log, which contains all orders at once.
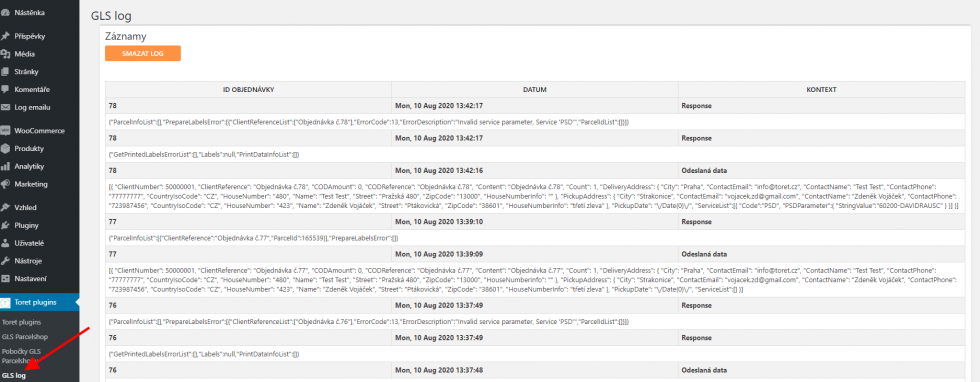
Shipment is not submitted and there is an error in GLS log
If the shipment is not submitted and the GLS log in the order detail only says “chyba” (error), check if you have correct implementation data in the plugin: email, password, and client ID, and whether there is an empty space before or after the inserted implementation data.
Also check if there is an empty space before or after filled values in the “ÚDAJE PRO VYZVEDNUTÍ BALÍKŮ” (PACKAGE PICKUP DATA) section.
Filter to remove the word “Zdarma” (Free) from free shipping
With the filter, you remove the text “Zdarma” from shipping when free shipping conditions are met.
Filter:
'tgls_parcelshop_shipping_cost_hide_free'
tgls_private_shipping_cost_hide_free
Example filter usage:
add_filter('tgls_parcelshop_shipping_cost_hide_free',function(){return true;});
add_filter('tgls_private_shipping_cost_hide_free',function(){return true;});