You are on the documentation page for the FOFR plugin for WooCommerce, which implements this shipping service into your e-shop. You can purchase the FOFR plugin here: Toret FOFR for WooCommerce
- Plugin Installation
- Plugin Activation
- Connecting to FOFR
- Setting up Shipping in the FOFR Plugin
- Shipping Zone Settings
- Shipment Submission from Web to FOFR
- Free Shipping
- Printing Labels
- Cash on Delivery (COD)
- Shipment Status Display
- Shipment Tracking
- Automatic Order Status Change Based on Shipment Status
- Other Optional Settings
- FAQ
- Plugin testing
Plugin Installation
Upon purchasing the plugin, you will receive a license key and a download link for the plugin zip file via email. You can find detailed instructions on how to install the plugin from your computer into WordPress here.
Plugin Activation
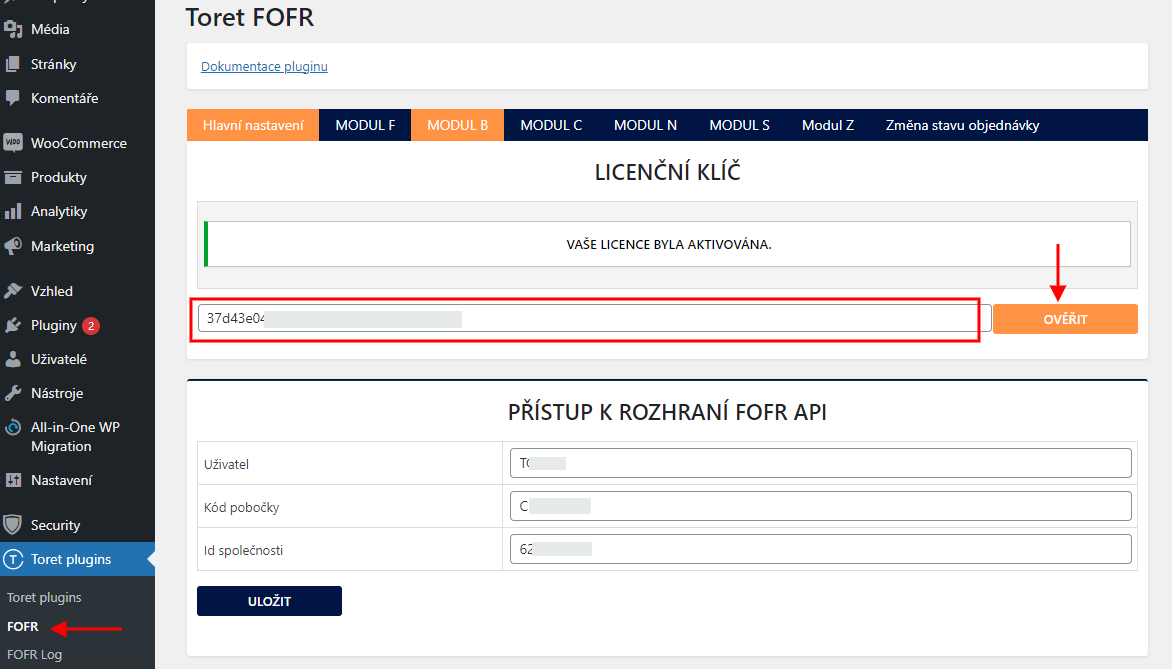
After installing the plugin, open the FOFR plugin, insert the license key into the appropriate field, and click the Ověřit (Verify) button to activate.
Connecting to FOFR
To use the FOFR plugin, you must have an account created at objednavky.fofrcz.cz/registrace.
After installing and activating the plugin, proceed to its settings. This is found in the section Toret plugins → FOFR
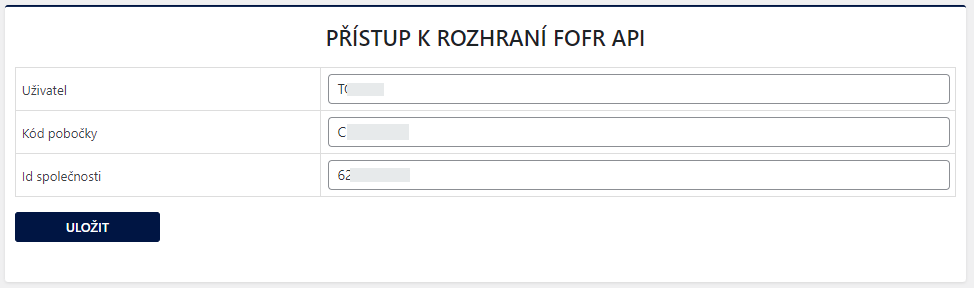
To connect the plugin with your FOFR account, you need to fill in your FOFR account login credentials in the plugin:
- Username (Uživatelské jméno)
- Branch code (Kód pobočky) – without #
- Company ID (ID společnosti)
You can find implementation data in your FOFR account at objednavky.fofrcz.cz in the top right corner.

Insert the branch code into the plugin without the hash sign – #. Insert only the numeric code.

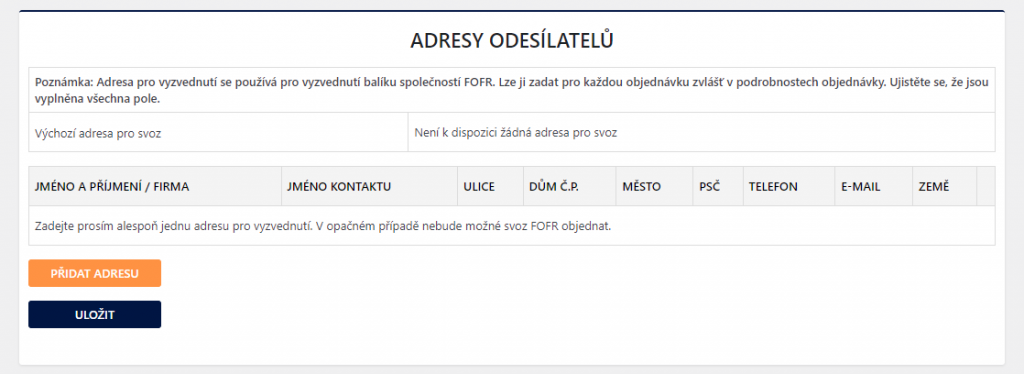
To be able to submit shipments, it is necessary to save at least one sender address in the plugin settings on the “Hlavní nastavení” (Main Settings) tab.
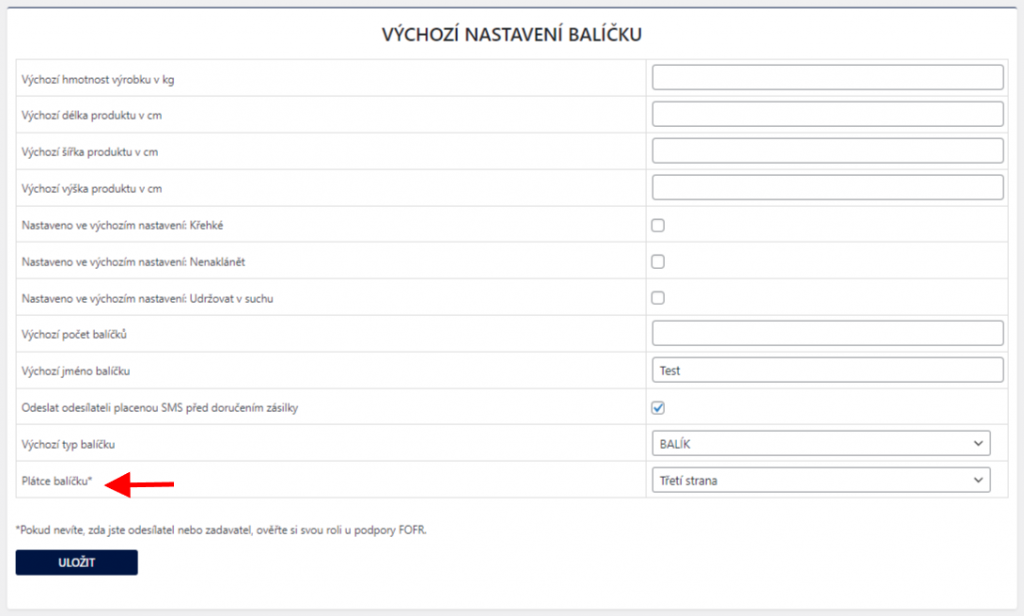
Package Payer Settings
On the “Hlavní nastavení (Main Settings)” tab in the “Výchozí nastavení balíčku (Default Package Settings)” section is the “Plátce balíčku (Package Payer)” setting. Select the payer type here. If you don’t know if you are the sender or the ordering party, verify your role with FOFR support.
Setting up Shipping in the FOFR Plugin
In the FOFR plugin, you can set up the following shipping for delivery within the Czech Republic:
- MODUL F
- MODUL B
- MODUL C
- MODUL N
- MODUL S
For international delivery, the plugin includes:
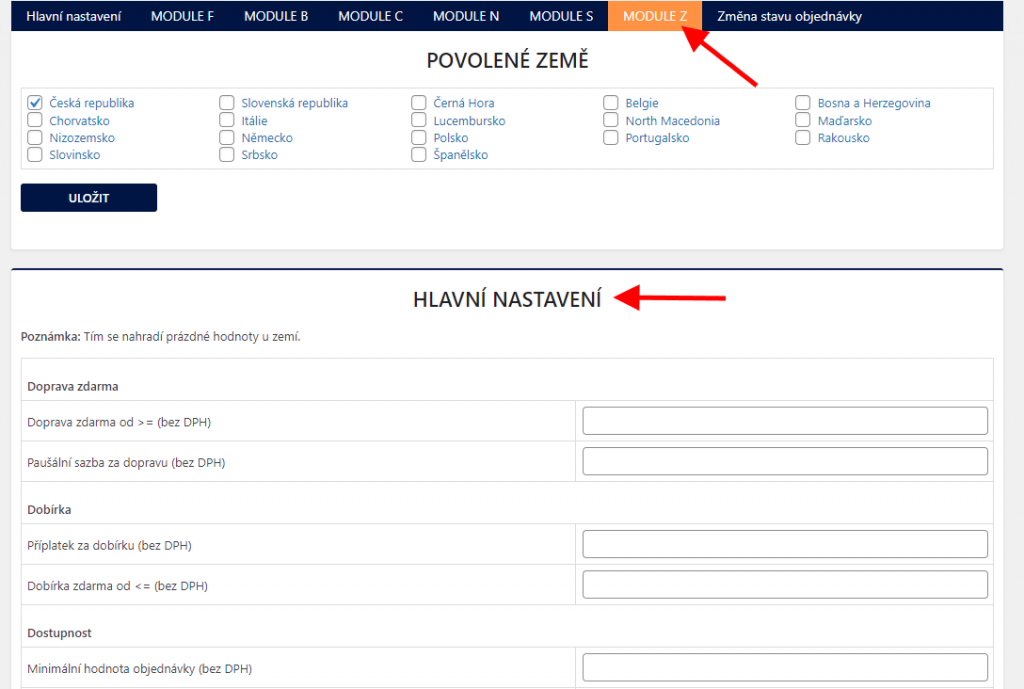
- MODUL Z
MODUL Z shipping supports delivery to 18 countries.
Under individual FOFR shipping tabs, it is possible to set:
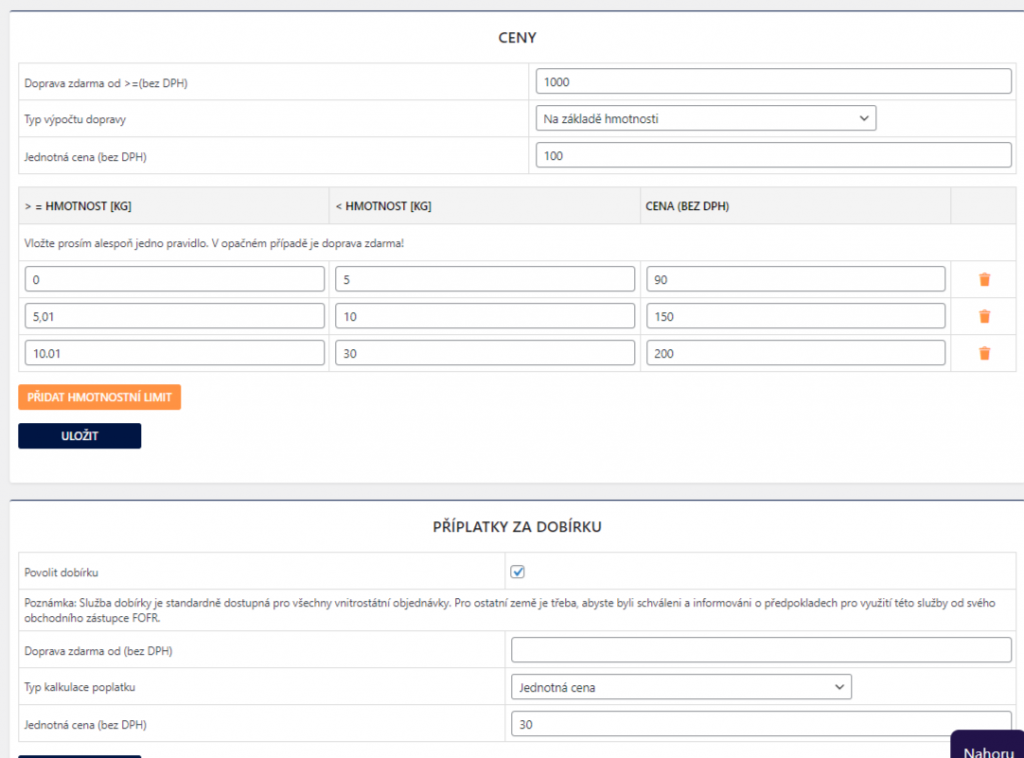
- shipping price
- flat rate
- scale shipping prices by total order weight or based on dimensions
- shipping price calculation according to API
- free shipping over amount
- cash on delivery (COD)
- flat surcharge
- scale COD surcharge by total order price
- free COD over amount
- shipping method availability (conditions for its display at checkout)
- by minimum and maximum order value
- by minimum and maximum quantity of products in the cart
- by minimum and maximum product price
- by minimum and maximum cart weight
Tip: if you want to trigger free shipping or free COD at checkout e.g. from 500, set the value 500 in the plugin.
In the MODUL Z shipping settings, there is a “Hlavní nastavení” (Main Settings) table. Here it is possible to set global values for all active countries in the given shipping. These are used as default if values are not set for a specific country. The shipping price is always set in the table for the activated country (below).
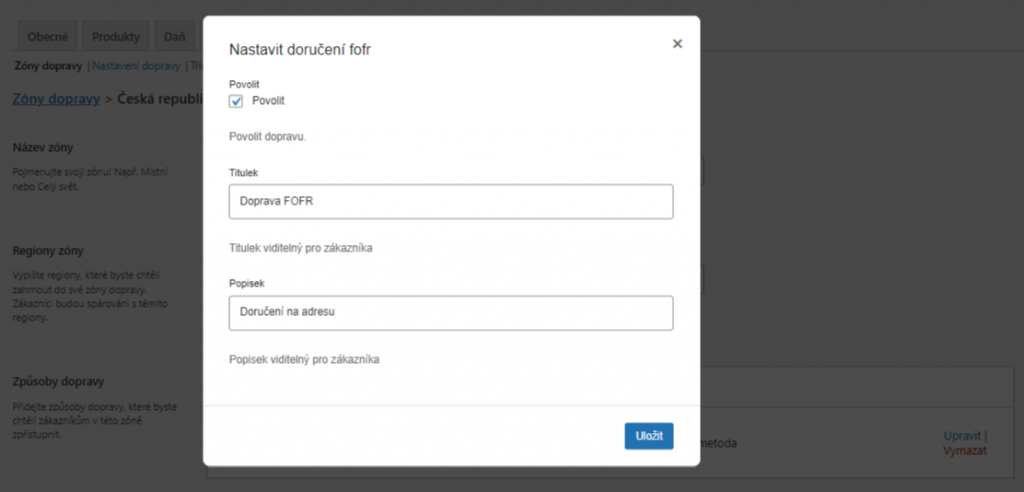
Renaming Shipping
Renaming individual carriers is possible in the WooCommerce shipping zone directly in the carrier edit (see below).
Shipping Zone Settings
After setting up shipping in the FOFR plugin, you need to set up identically named carriers in WooCommerce shipping zones. Without setting them in shipping zones, carriers from the FOFR plugin will not appear at checkout.
Set the shipping method in WooCommerce > Settings > Shipping > required shipping zone > Add shipping method.
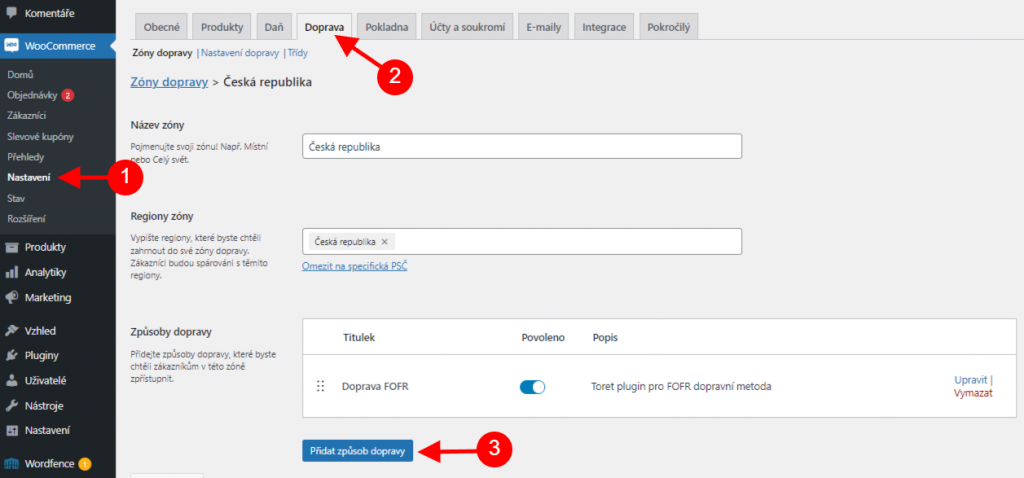
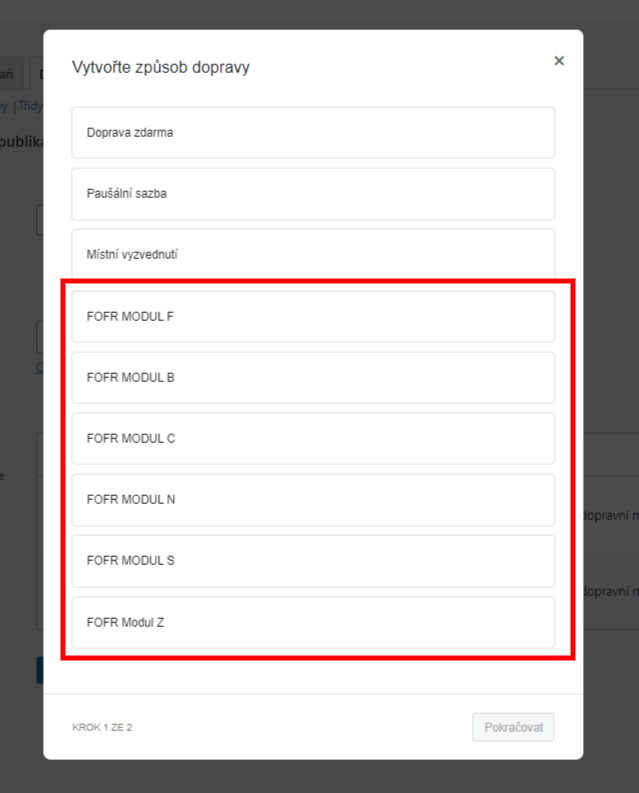
Select from the offered shipping methods and click Continue.
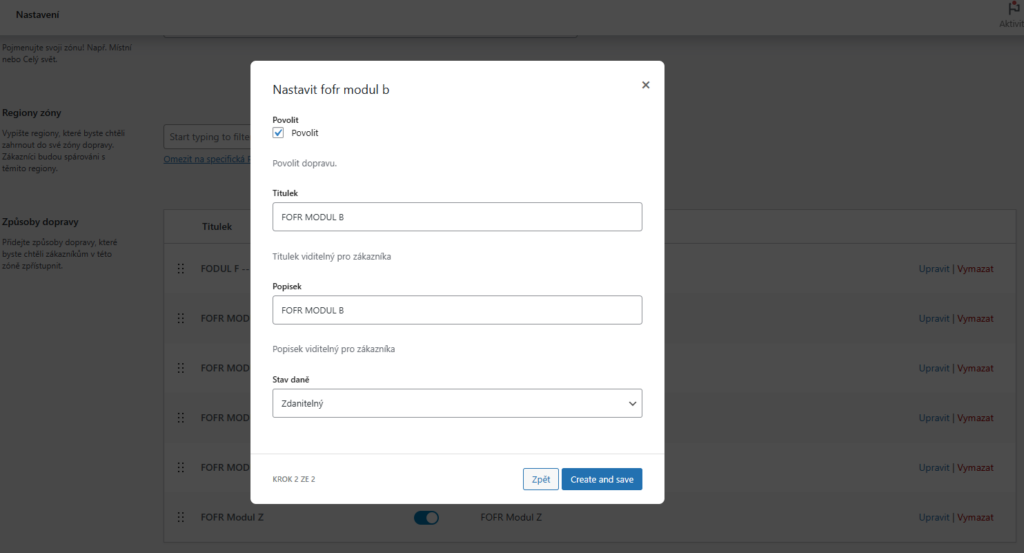
In the next step, choose the Title and Description of the shipping method and Tax Status (Taxable or None). Click Create and save. The new shipping method is created.
Shipment Submission from Web to FOFR
There are three options for submitting a shipment to the FOFR system in the plugin.
Attention! Do not send the order to the FOFR system unless you are ready to ship the package. By submitting the package, you indicate to FOFR that you have the package ready for courier pickup.
Manual Submission
1) Manually via a button in the order overview or in the order detail

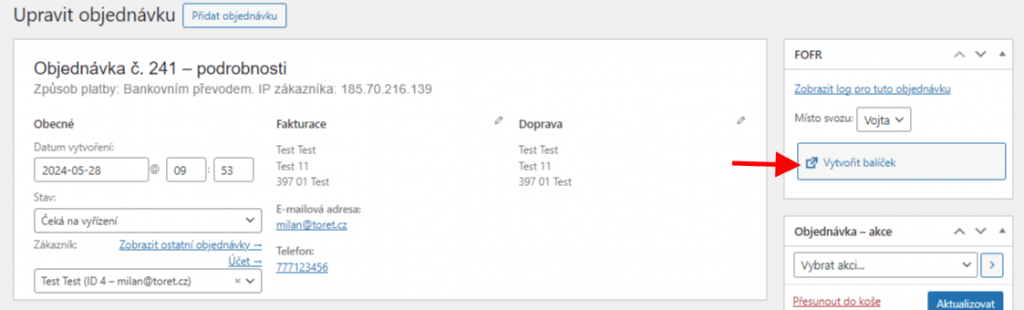
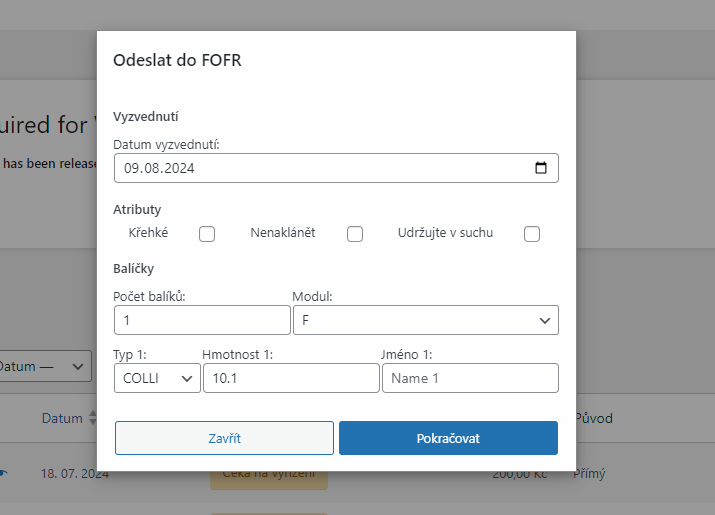
Clicking the button opens a dialog box allowing you to complete or change shipment attributes.
Displaying this dialog box can be disabled in the Hlavní nastavení (Main Settings) of the plugin, in the Vyskakovací okna (Pop-up windows) section. In this case, however, you must have attributes preset (Main Settings > Default Package Settings).
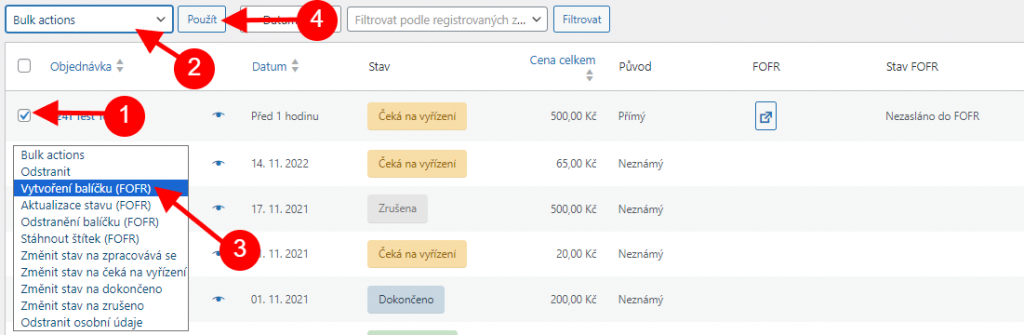
2) Manually via bulk actions in the order overview.
For bulk submission, you must select orders and use the bulk action “Vytvoření balíčku FOFR” (Create FOFR package).
When submitting via bulk actions, the window with shipment attributes does not open. Therefore, it is necessary to have attributes preset in the Hlavní nastavení (Main Settings) of the plugin in the Výchozí nastavení balíčku (Default Package Settings) section.
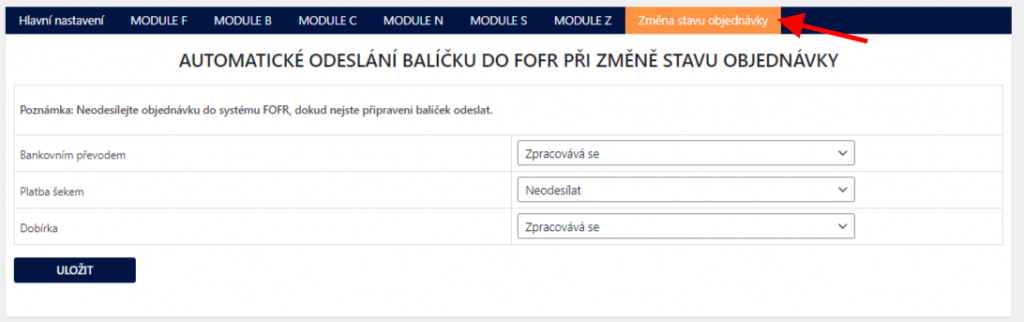
Automatic Submission on Order Status Change
The third submission method is automatic submission based on order status change. Automatic sending can be set in the FOFR plugin → Změna stavu objednávky (Order Status Change).
Free Shipping
You can set free shipping directly in the FOFR plugin for each carrier.
EXAMPLE: If you want free shipping from 500, set the value 500 in the plugin.
If you are a VAT payer, it is possible to activate the function “Nastavovat ceny včetně DPH” (Set prices including VAT) on the “Hlavní nastavení” (Main Settings) tab. Then you can set the free shipping value including VAT in the plugin.
The free shipping amount setting applies only to products; the shipping price is not included.
EXAMPLE: If you have free shipping set from 500, and the cart contains a product for 450 + shipping price 65 = 515 CZK, free shipping will not be activated. It is necessary to meet the set free shipping value condition, i.e., to activate free shipping set this way, you need to put product(s) worth at least 500 CZK into the cart.
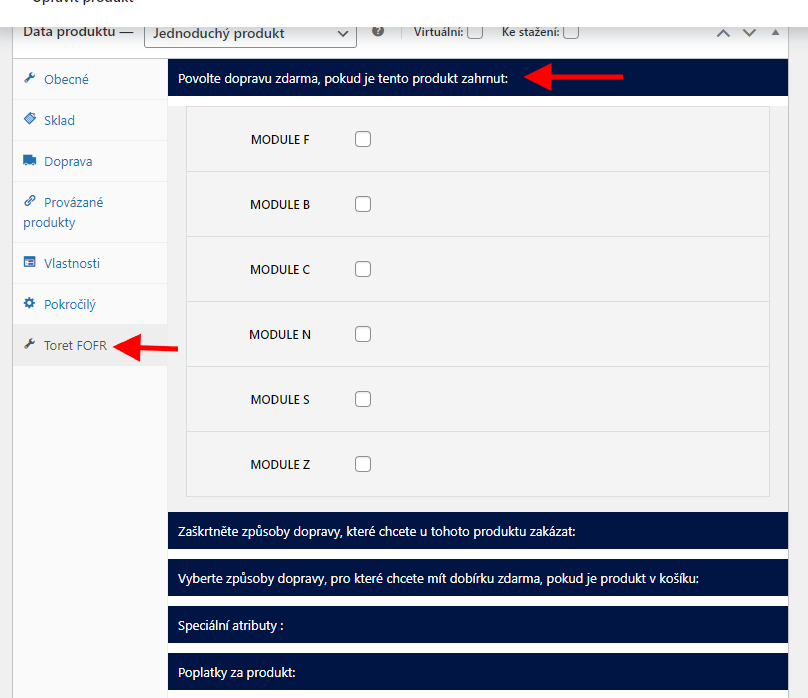
Free Shipping Only for Selected Products
In the plugin, it is possible to set free shipping only for selected products. Settings can be found for each product on the FOFR tab.
Printing Labels
Labels of submitted packages can be downloaded directly in the website administration.
In the order overview for an order already submitted to the FOFR system, click on the PDF document icon (see image) for the selected order. The label will be saved in PDF format, and then you can print it.

For a submitted shipment, the label can also be downloaded in the order detail.

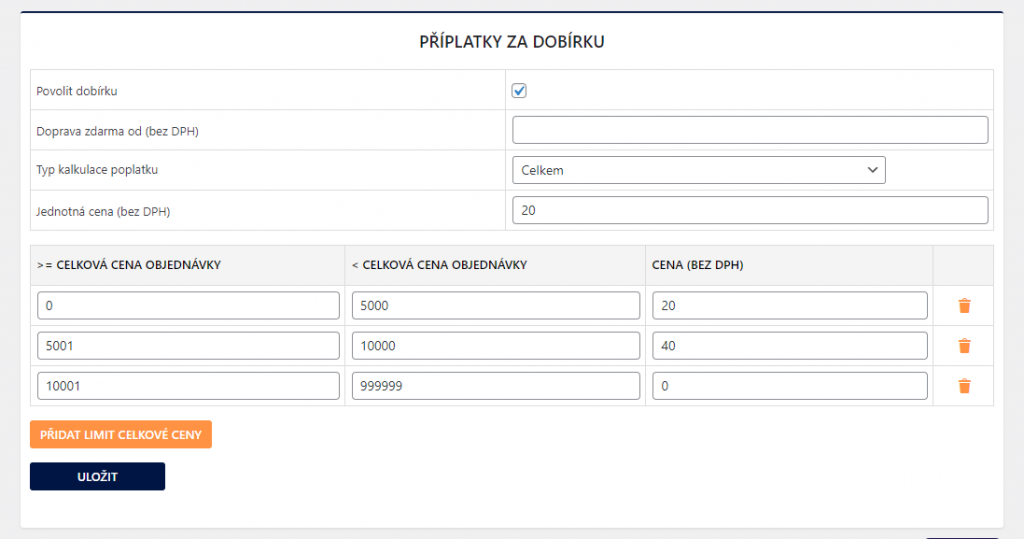
Cash on Delivery (COD)
For individual carriers, it is possible to set a COD surcharge for each country. For the surcharge to appear in the checkout and the information that the submitted package is COD to be transferred, it is necessary to enable the WooCommerce COD payment method (=cod) in WooCommerce settings.
In the plugin, you can set a uniform COD surcharge and a condition for triggering free COD. Or you can scale the COD surcharge according to the total order price, including a rule with zero COD surcharge see screen.
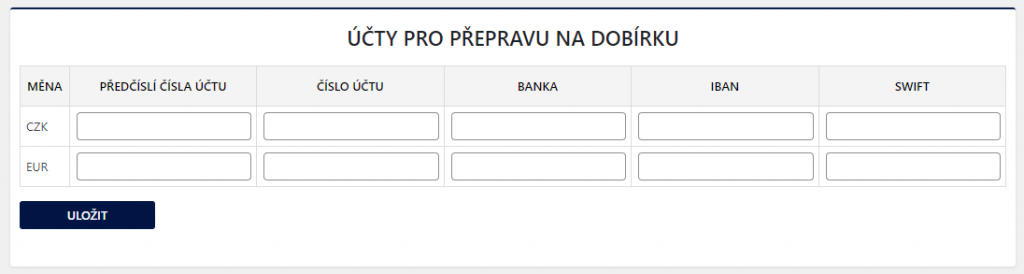
In the Hlavní nastavení (Main Settings) of the plugin, it is also necessary to set the bank account for COD payout.
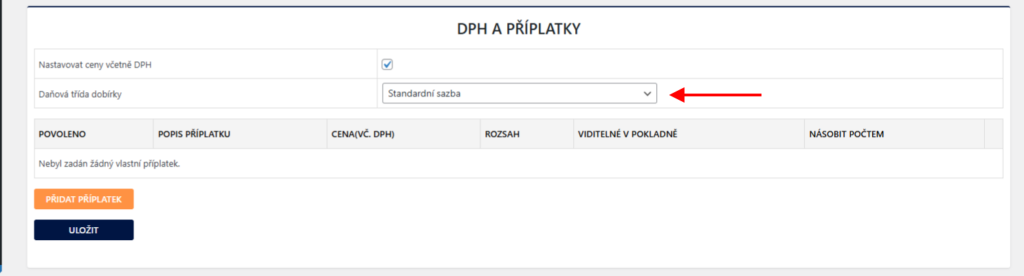
Furthermore, in Main Settings, in the “DPH a příplatky” (VAT and Surcharges) box, set the COD tax class – you can set a fixed rate or determine it by items in the cart.
Shipment Status Display
The plugin has a function that allows displaying the current shipment status in the order overview in the “Stav FOFR” (FOFR Status) column.

Manual Shipment Status Update
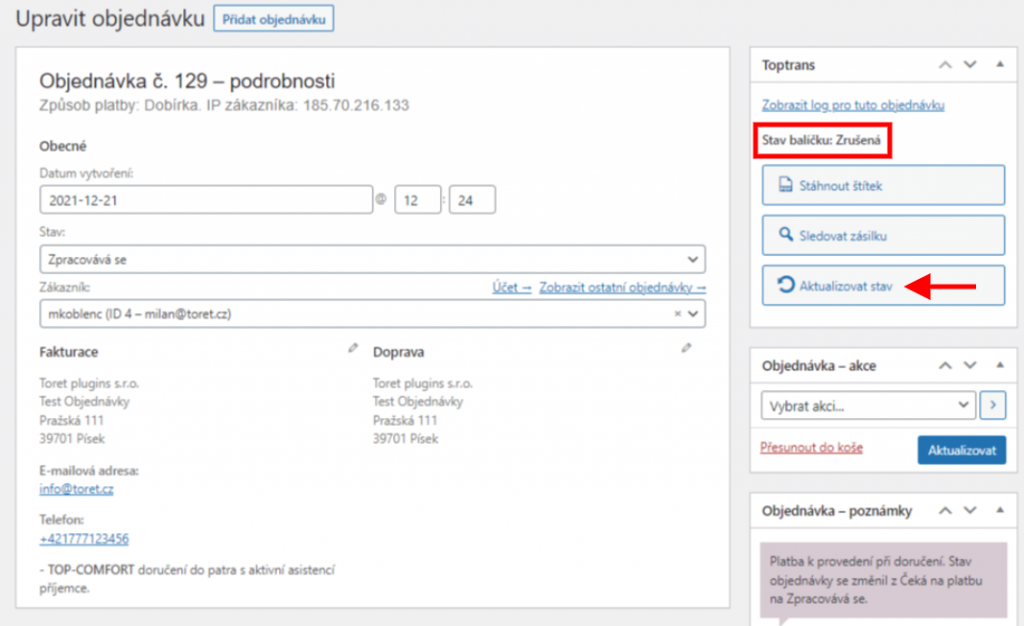
You can update the shipment status manually via the “refresh” icon. You can start the manual update in the order overview individually for each order or in the order detail.

Automatic Shipment Status Update
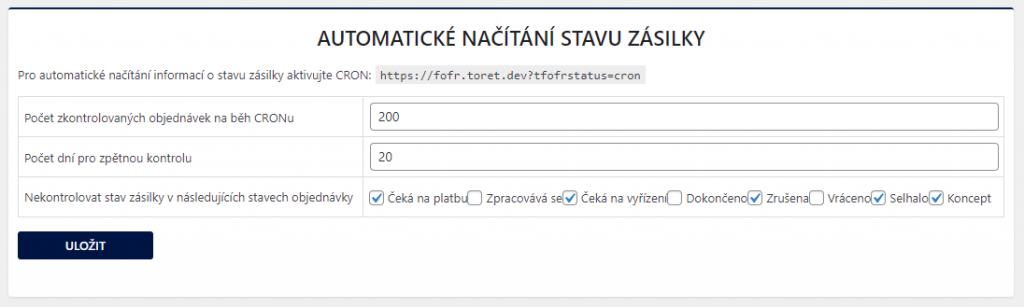
You set automatic update on the Změna stavu objednávky (Order Status Change) > Automatické načítání stavu zásilky (Automatic Shipment Status Loading) tab.
Here it is possible to set conditions for automatic shipment status updates. It is also necessary to set the CRON URL on the hosting and run it regularly according to the function setting, e.g., so that orders are checked once an hour.

Shipment Tracking
Once the shipment is created, a tracking link is created for it, under which information about the submitted shipment is listed.
The “Sledovat stav zásilky” (Track shipment status) link is automatically added to the customer’s email they receive when the order status changes. The condition is that the shipment must already be created when the order status changes.
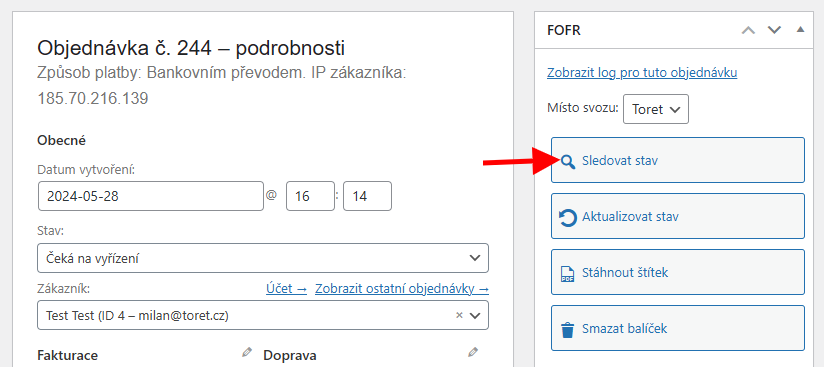
The shipment tracking link is also listed in the order overview in the FOFR column under the magnifying glass icon. The same button is also in the order detail.

Automatic Order Status Change Based on Shipment Status
To automatically change the order status based on the shipment status in transit, you must first set the Automatic Shipment Status Loading function (see above) on the Změna stavu objednávky (Order Status Change) tab.
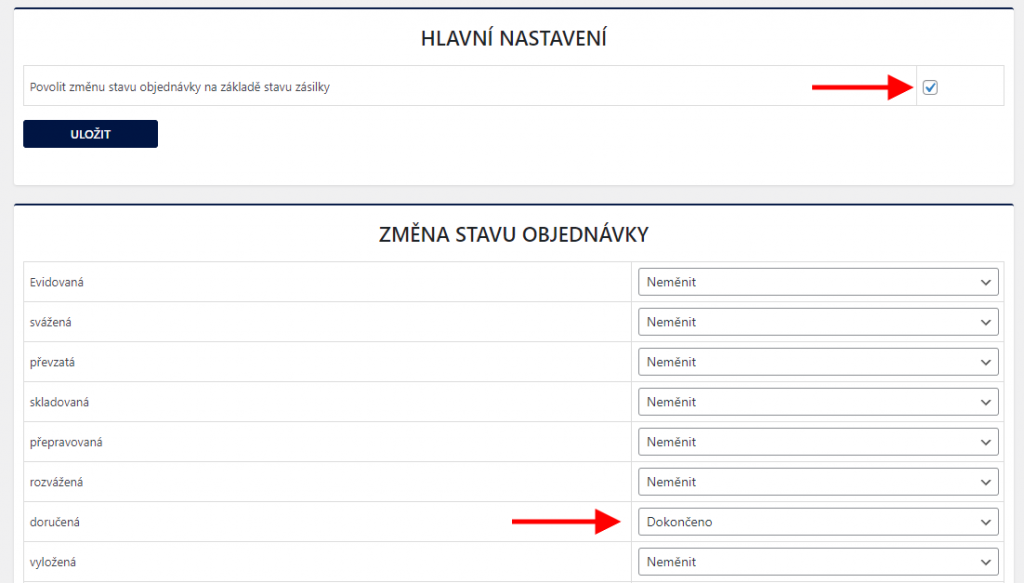
On the same tab (Změna stavu objednávky), it is also necessary to activate the function Povolit změnu stavu objednávky na základě stavu zásilky (Enable order status change based on shipment status).
In the last step, you need to set the order status to which the order should switch when the shipment status is updated.
Other Optional Settings
Here you will find other functions that the plugin contains and their setting is not mandatory for the plugin to function.
Plugin Settings → Main Settings
On the “Hlavní nastavení” (Main Settings) tab in the plugin settings, you will find most of the other functions.
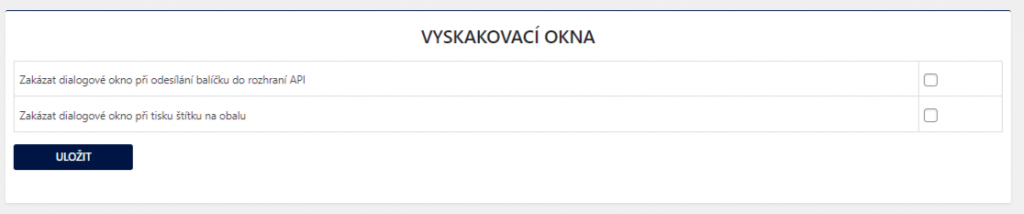
Pop-up Windows (Vyskakovací okna)
In this function, it is possible to turn off the dialog box when manually sending a package. The function is used in combination with the set “Výchozí nastavení balíčku” (Default Package Settings) function, in which you fix the values that are otherwise filled in the dialog box.
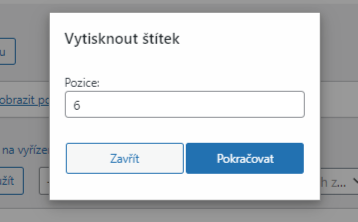
Furthermore, it is possible to turn off the dialog box when downloading the created label, in which the label position on the PDF document is set. This immediately downloads the label with the position in the first place. Alternatively, it is possible to set the default label position in the plugin settings under the function of the same name – “Výchozí pozice štítku balíčku” (Default package label position).
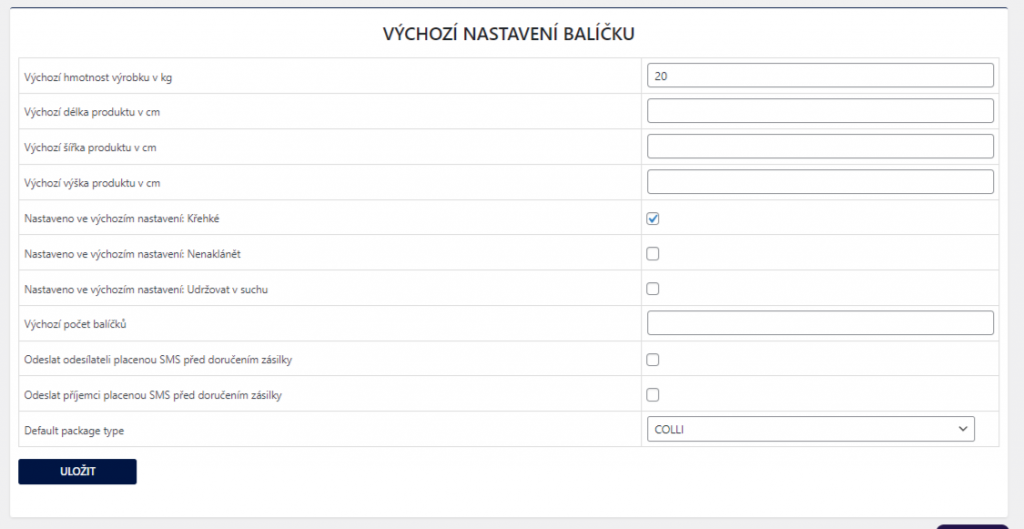
Default Package Settings (Výchozí nastavení balíčku)
Here it is possible to set default shipment values that will be used during submission if the order does not contain the given values. For example, if the product does not have a set weight and the order is without weight, the preset weight for the shipment is filled in.
It is also possible to preset shipment attributes such as shipment type, designation, or services.
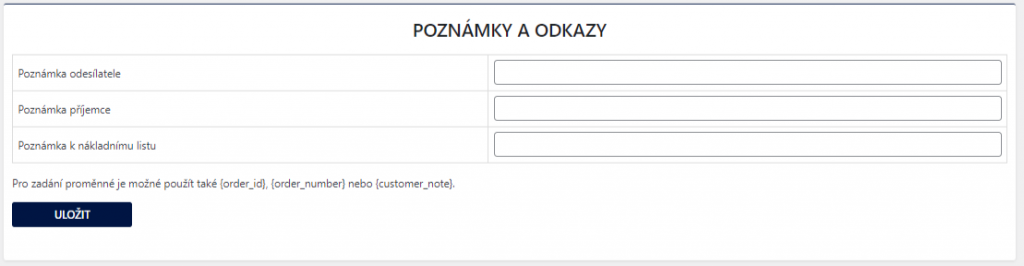
Notes and Links (Poznámky a odkazy)
When creating a shipment, it is possible to set a note for the sender, recipient, or the consignment note.
The note can also be set using variables: {order_id}, {order_number} or {customer_note}
Labels (Štítky)
Here you can set the default position of the shipment label for printing. This position can also be set in the dialog box when printing the shipment label individually.

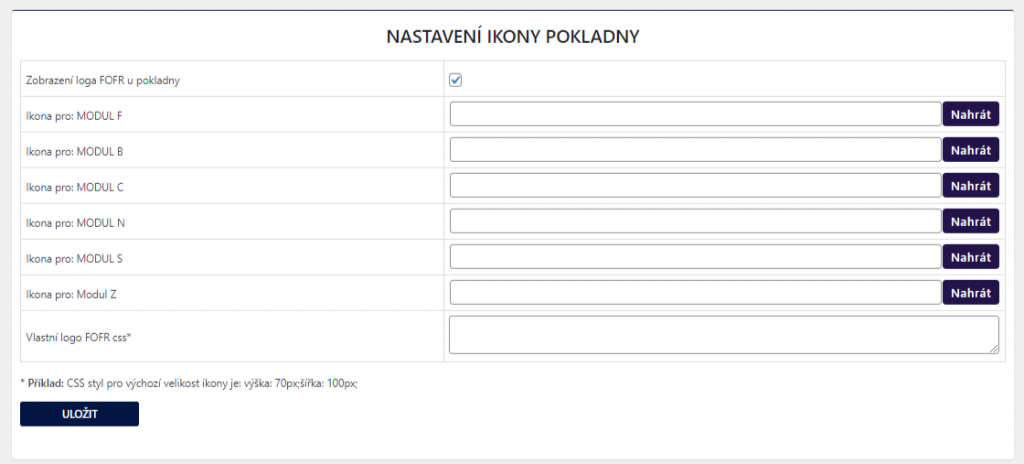
Checkout Icon Settings (Nastavení ikony pokladny)
The plugin contains a default icon that is displayed in the checkout before the shipping name. Here it is possible to turn off the icon display or set your own icon for individual shipping methods. In the plugin settings, it is possible to style logos using CSS styles.
Exchange Rate Settings (Nastavení směnných kurzů)
If it was necessary to recalculate the shipment value to another currency, it is possible to select the exchange rate source or set your own rate.

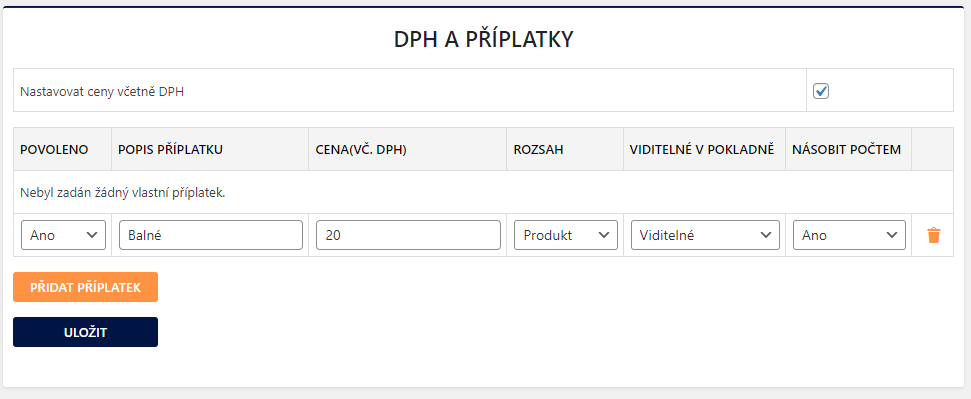
VAT and Surcharges (DPH a příplatky)
If you are a VAT payer and have VAT set up in WooCommerce, we recommend activating the “Nastavovat ceny včetně DPH” (Set prices including VAT) function. Then it is possible to set all values incl. VAT in the plugin.
Another function is the ability to create custom shipping surcharges.
Surcharge settings are very variable. You set:
- description
- price
- visibility in checkout
Here it is possible to turn off or turn on the surcharge visibility in the checkout. If the fee visibility is turned off, the fee is added to the shipping price.
- multiply by quantity
It is possible to set the surcharge to be calculated for each piece of product in the cart. If the multiply by product quantity function is turned off, the surcharge is calculated only once for the entire order.
- range
The surcharge range can be set globally for all products, for selected shipping methods from the plugin, for products in a selected category, or for selected products or variants.
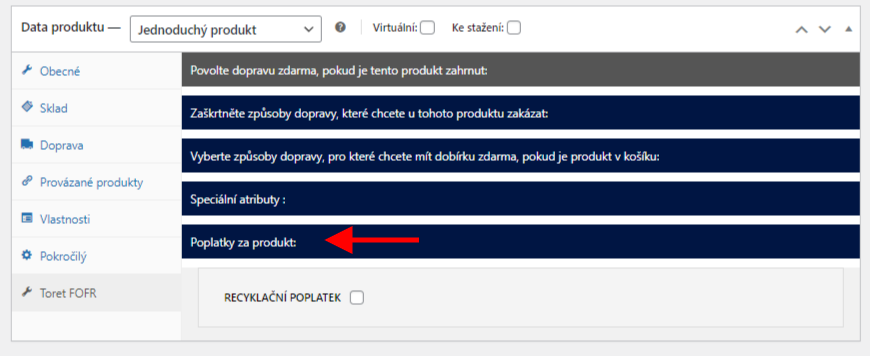
Once the surcharge is created with a set range for the product, it appears in the product detail on the “Toret FOFR” tab. Here you can enable it for the product or not.
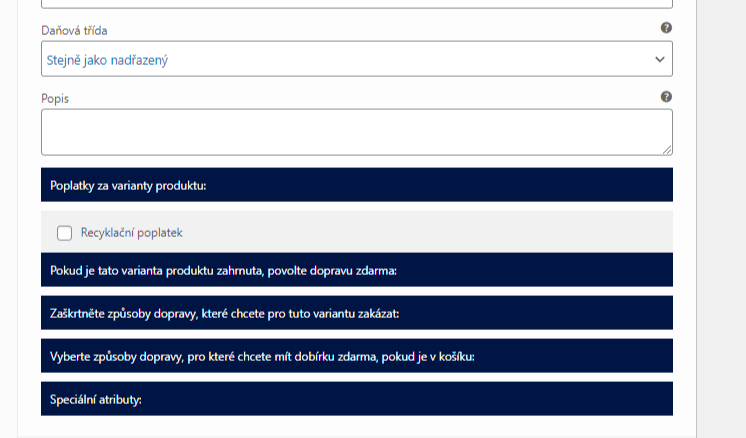
The same setting is at the level of each variant if the surcharge is set with a range for the variant.
If the surcharge has a range set for Category, it is possible to enable it in the category setting or when creating it.
Shipping Settings at Product, Variant or Category Level
Shipping settings in the plugin are global for all products in WooCommerce.
The plugin includes the option to set selected functions for separate products/variants.
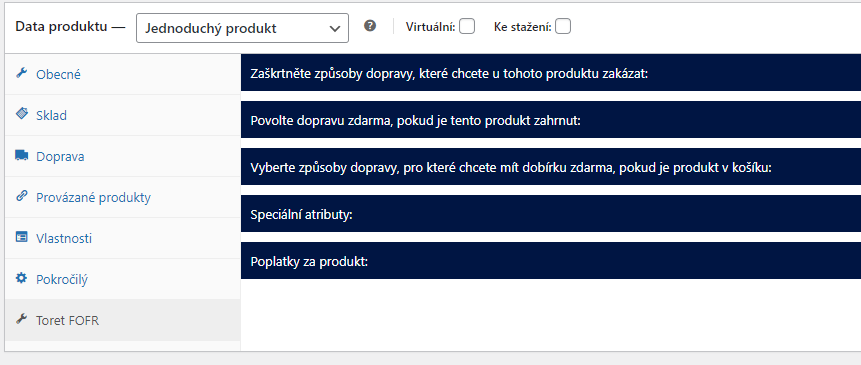
In the product settings on the “Toret FOFR” tab, there are individual dropdowns with functions. It is possible for a specific product to:
- set free shipping
- disable selected shipping
- set free COD
- fix attributes e.g. “Fragile”
- activate created fees
The same shipping setting is at the end of each variant or category.
Plugin testing
For testing purposes, you can use:
- the subdomain “dev.domainlicense” (with the same license as for the production website)
- localhost (127.0.0.1)
Purchased plugins will also work in these locations, and you can test their implementation and compatibility here before deploying them to the website and during its use.
FAQ
Shipment was not created
In case you set the plugin according to the documentation and shipment creation failed, go to the order detail, on the right is the FOFR box and in it is the link “Zobrazit log pro tuto objednávku” (View log for this order). In the log, you will find information about the submitted order and the error message.
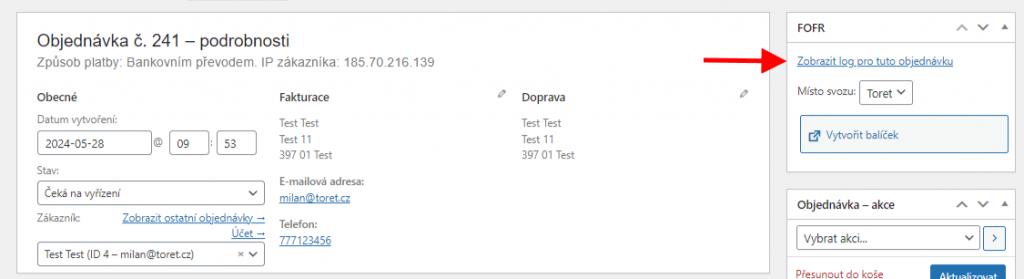

If you don’t know what to do with the error in the log, write to our support.